Crew List
The crew list holds the people currently on board a vessel: who fills which position, when they embarked and when they leave. It is also the place where a crew member gets the user account they need to work in ZeeBORN, and where the official crew list for the authorities is printed.
Opening the crew list
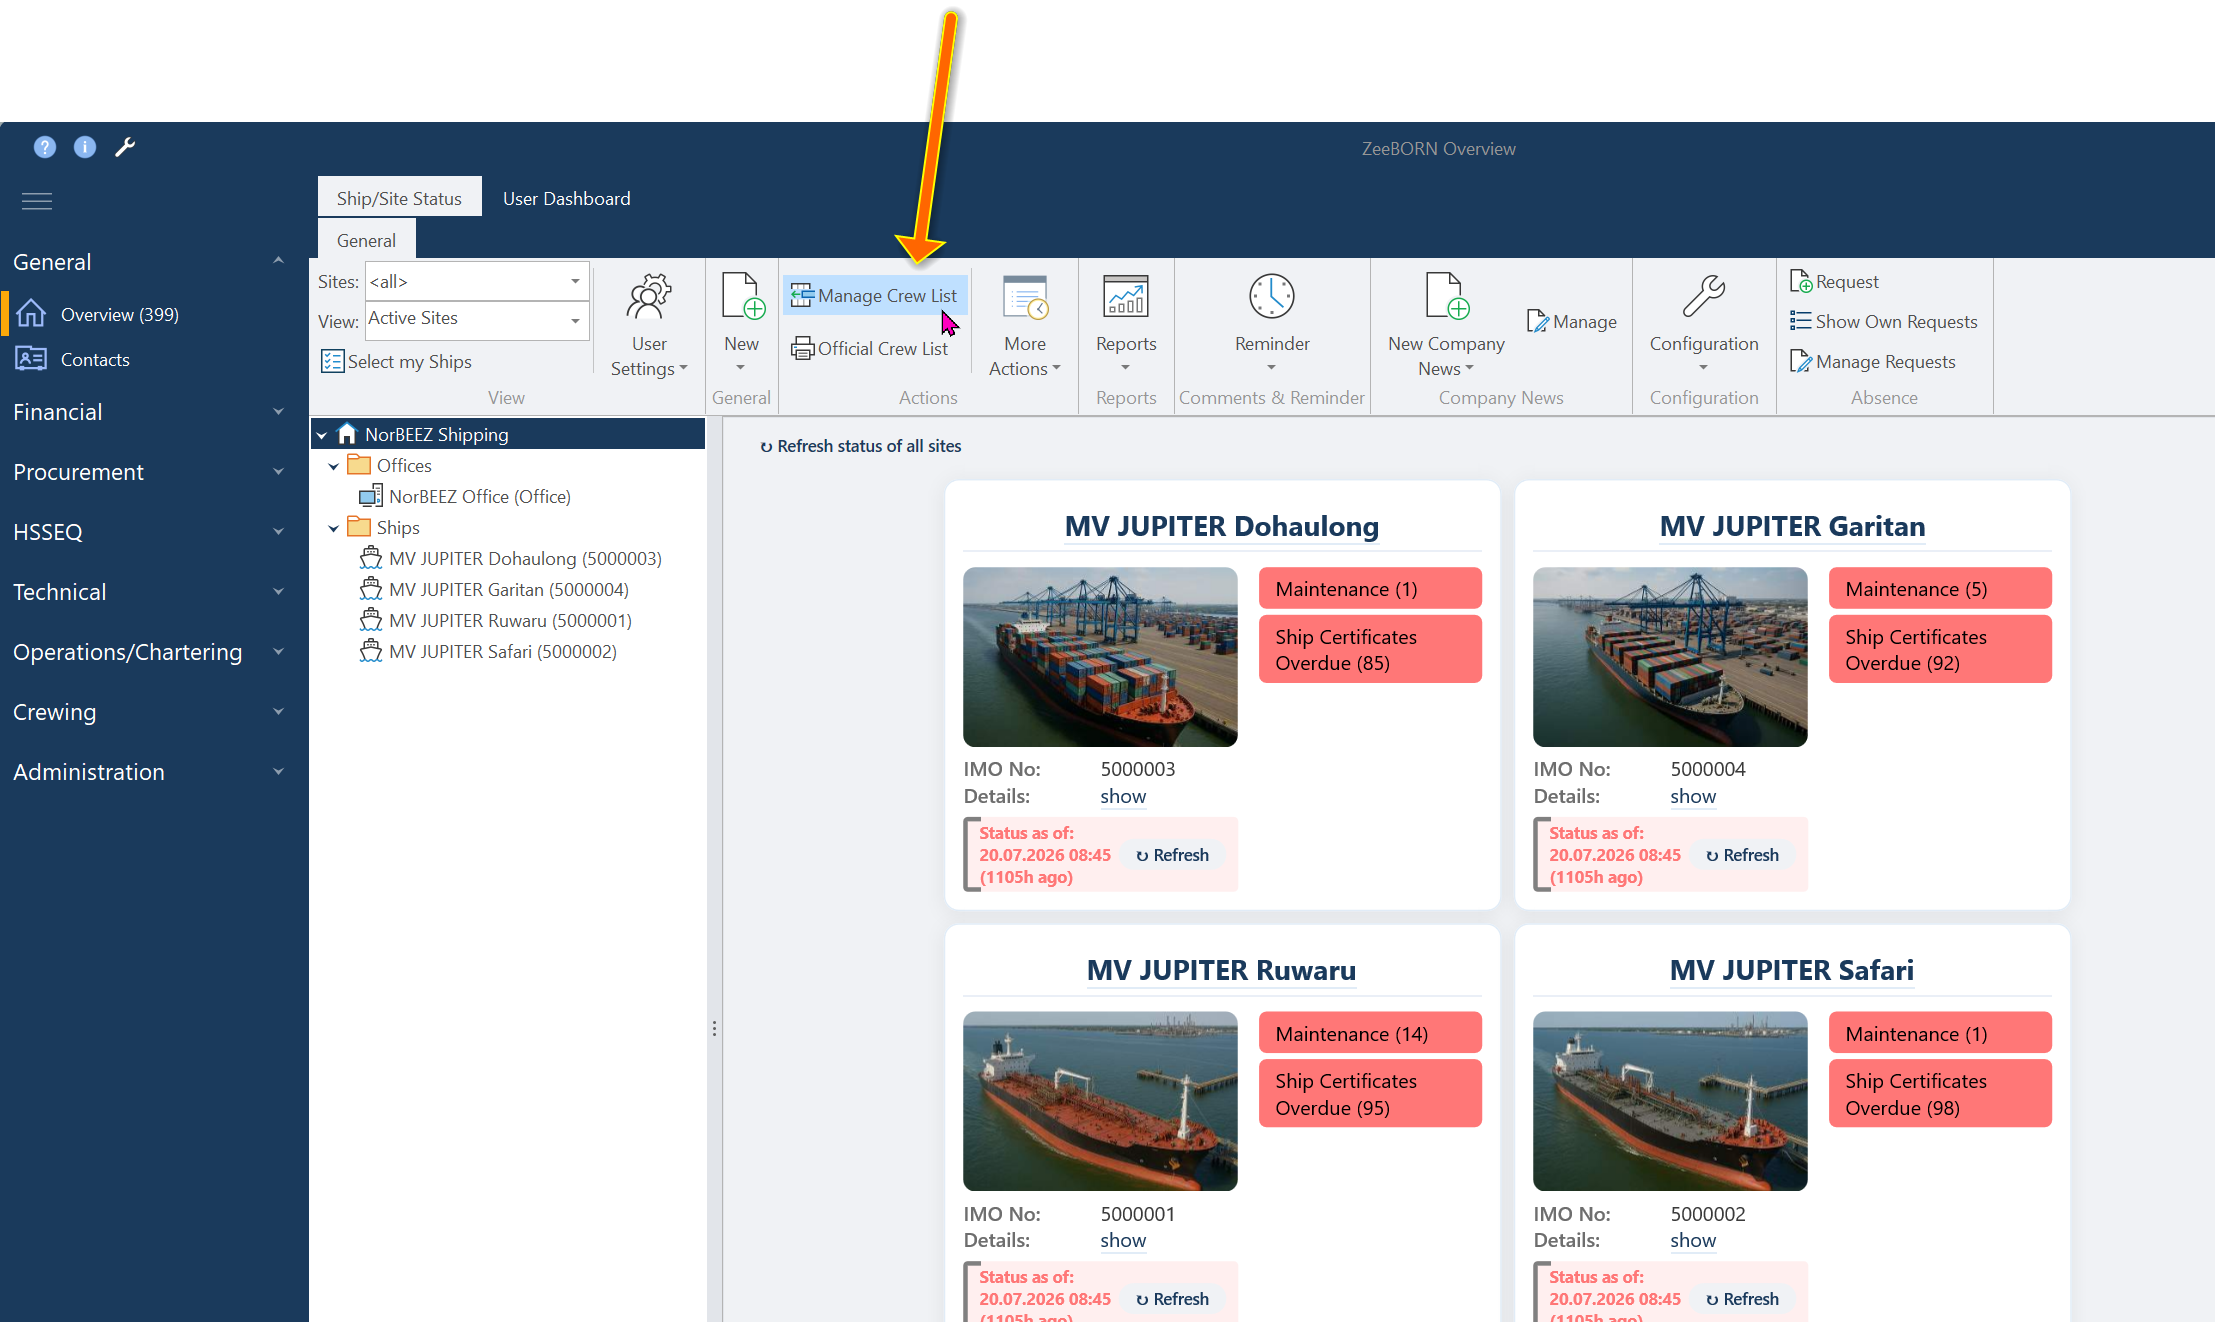
In the Overview module, select the vessel and click Manage Crew List.
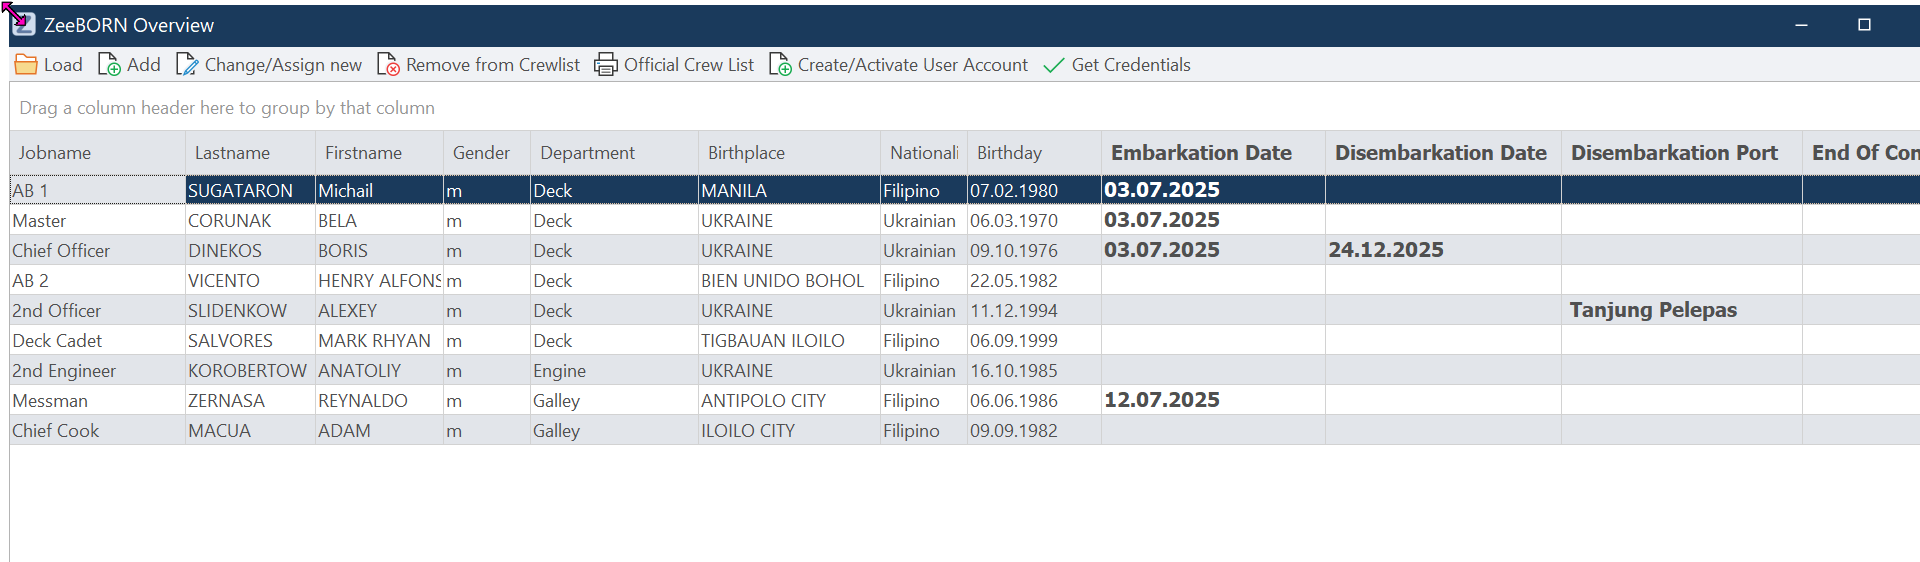
The list shows everyone currently signed on, with rank, name, department, nationality and the dates that matter: Embarkation Date, Disembarkation Date, Disembarkation Port and End Of Contract.
Adding a position
Add creates a new or additional position. A dialog asks for the rank - click the arrow and pick one from the list.
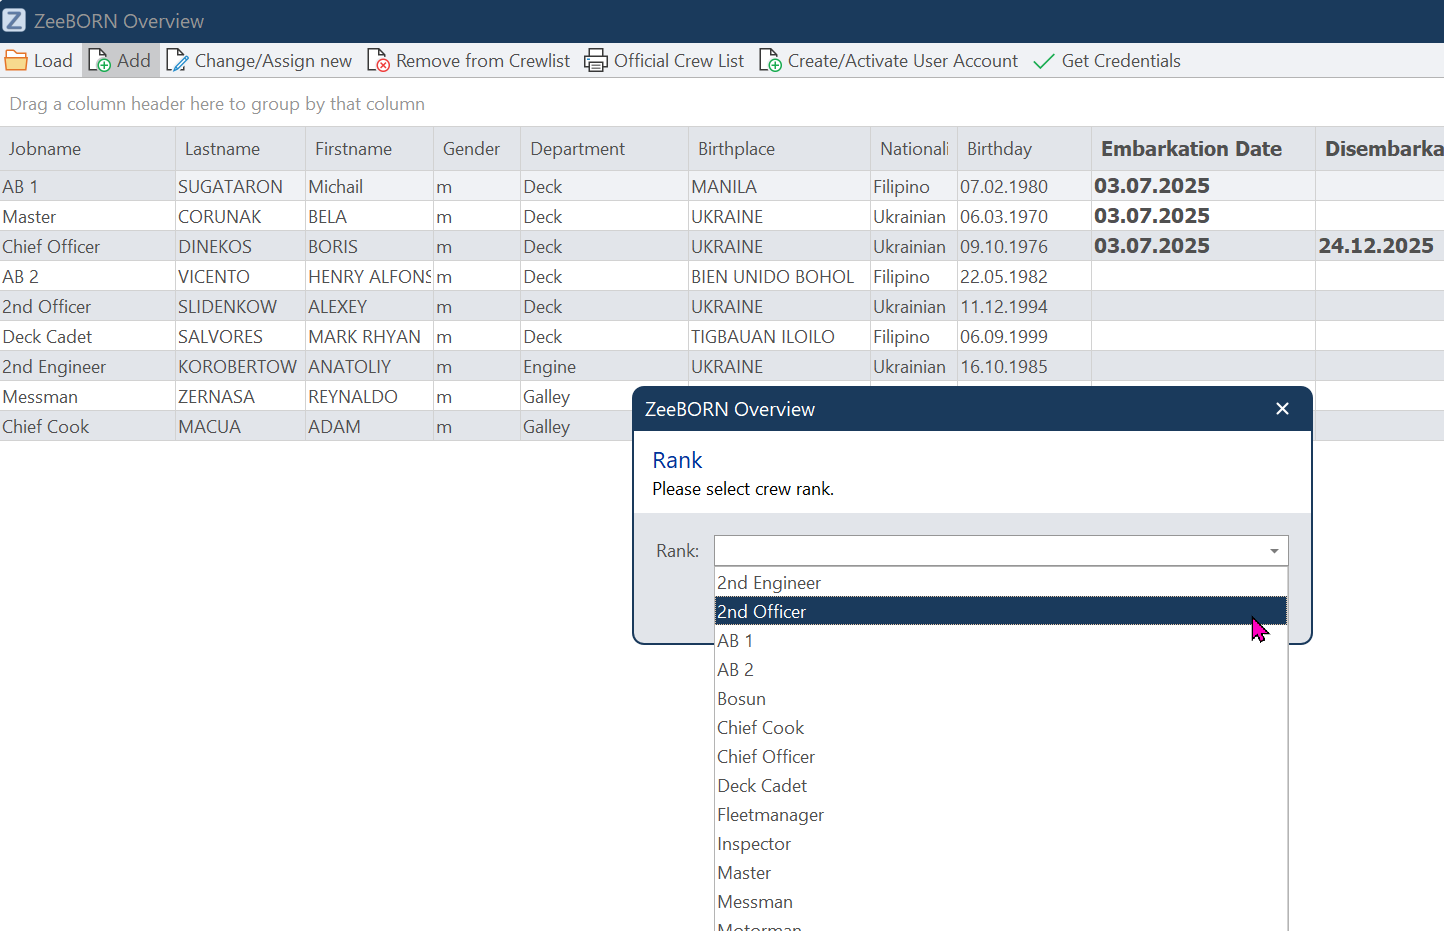
The rank matters beyond the printed list: it decides which user role the person receives if a user account is created later.
Putting a person on a position
Select the position and click Change/Assign new. A search window opens.
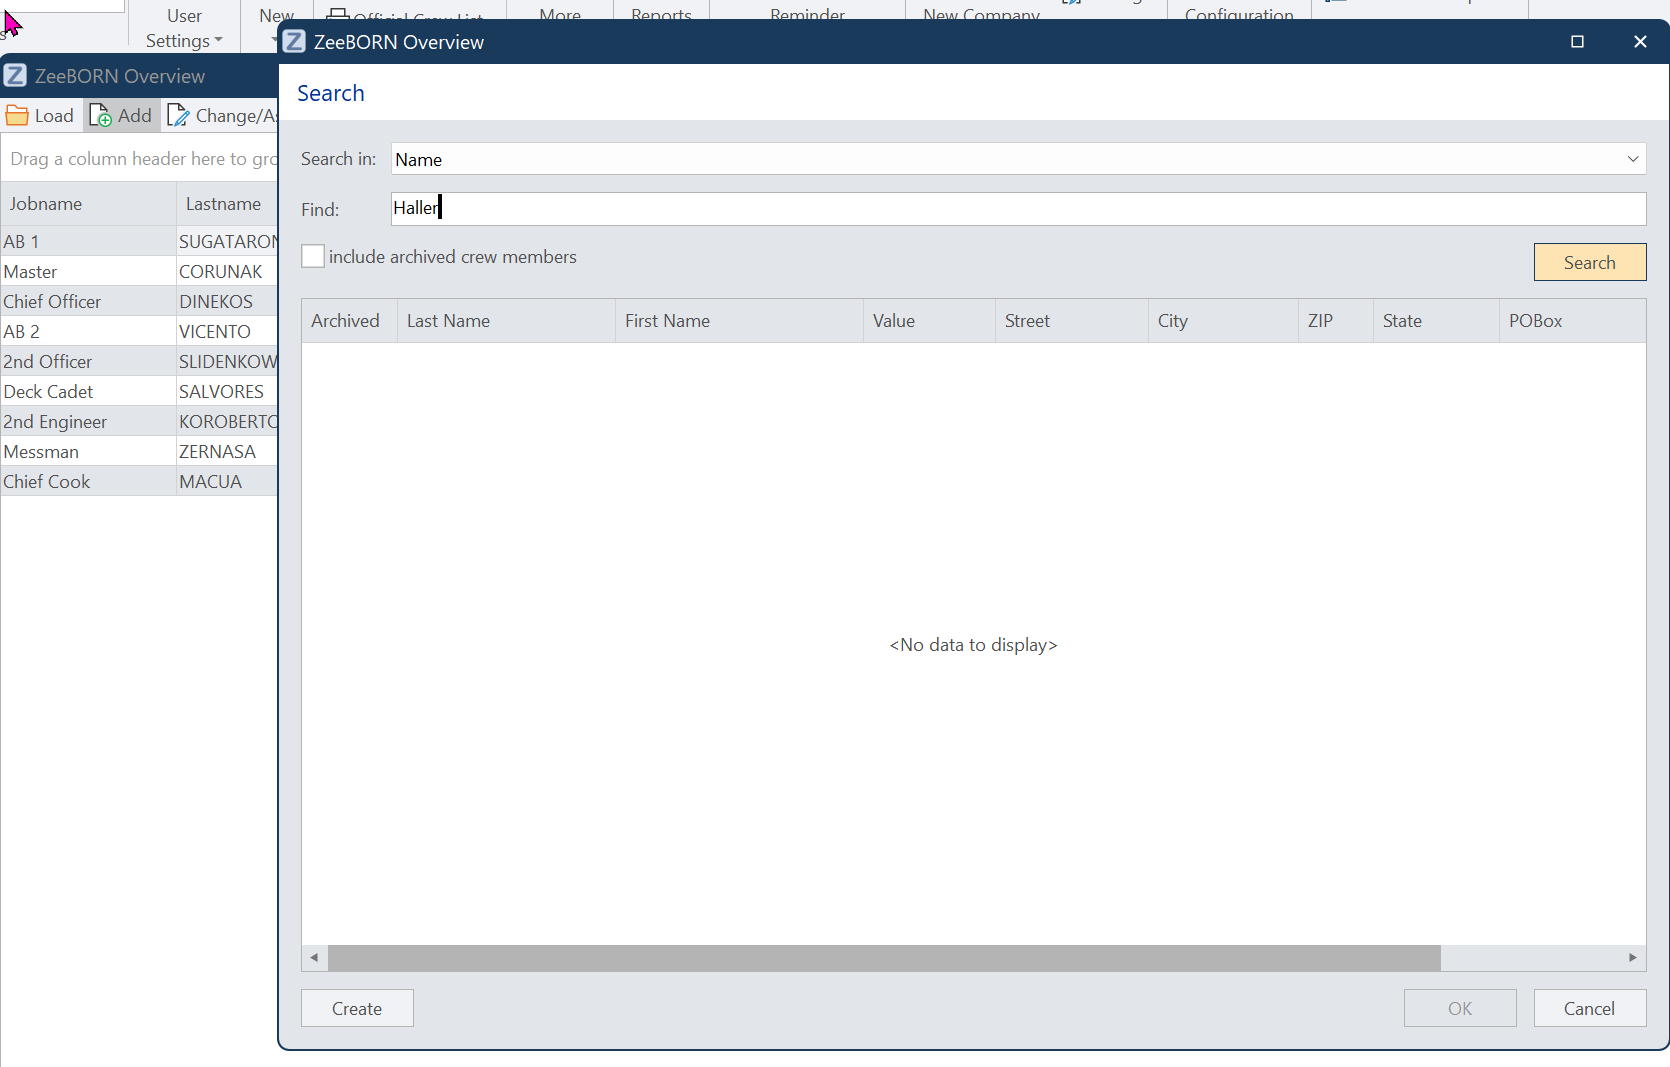
Type the name into Find and click Search - the search does not start on its own while you type.
Search in decides what is searched: Name (the usual case), Address, Communication - a telephone number or e-mail address - Remarks, or the CrewID if you happen to know it.
If the person has sailed with the company before, tick include archived crew members. Without it, archived entries stay hidden and the person looks unknown - which is how the same person ends up on file twice.
Pick the person from the result list and confirm with OK.
Creating someone who is not on file yet
If the search finds nobody, click Create at the bottom left. The rank is already filled in from the position you selected.
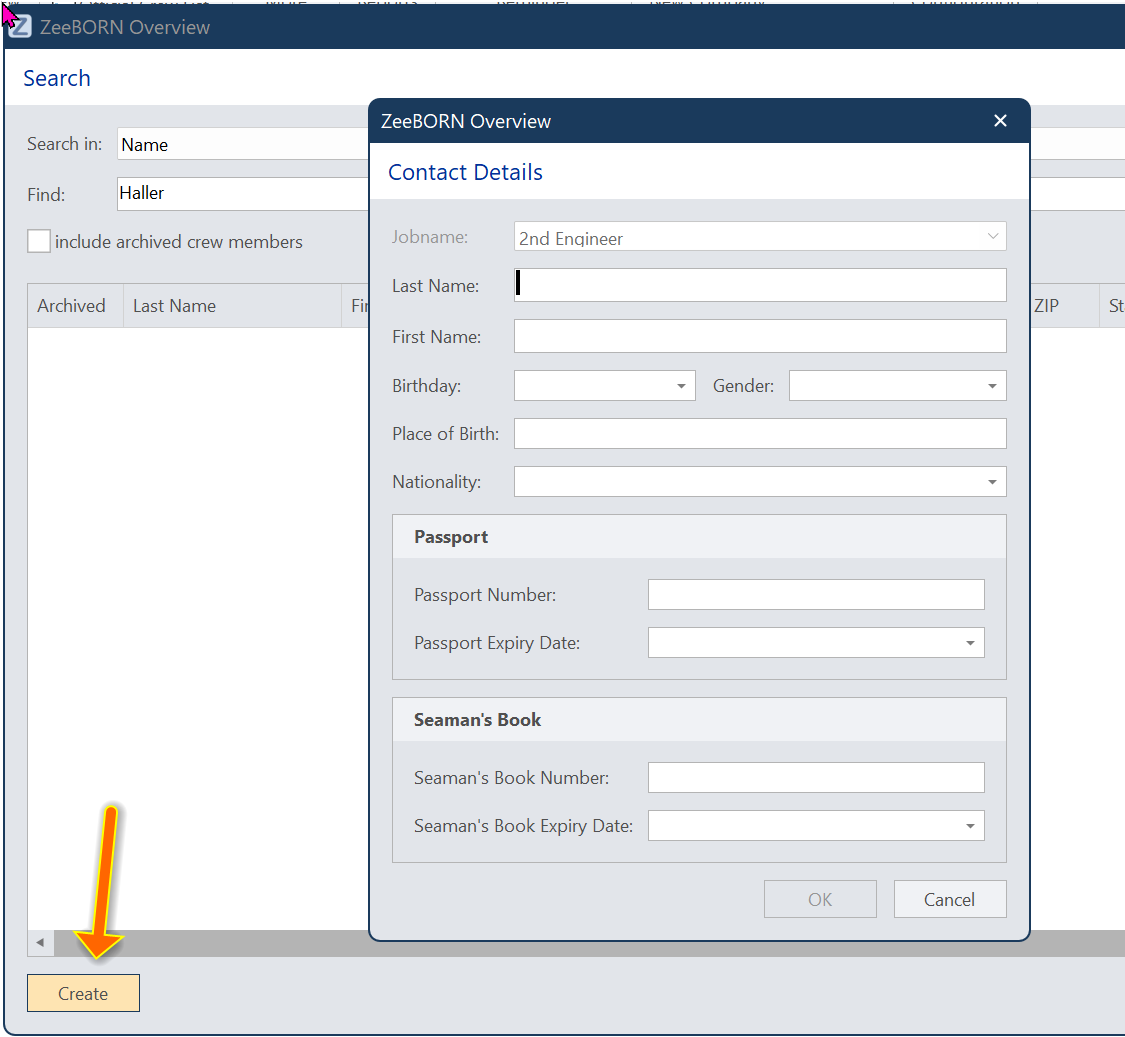
Enter last name, first name, date of birth, gender, place of birth and nationality. Passport and Seaman's Book - number and expiry date - can be entered here as well, and it is worth doing so straight away: they are the details that are asked for when the papers are checked.
Confirm with OK; the person then appears in the list and can be selected.
Embarkation and disembarkation
Fill in the embarkation date for every person you put on the list - click into the field and either pick the date from the calendar or type it in.
Keep the disembarkation date, the disembarkation port and the end of contract up to date as well, rather than filling them in when the printout is already needed. They are what makes the printed crew list correct for arrival and departure.
Remove from Crewlist takes a person off the list and asks for confirmation first, naming the position and the person.
The user account
A crew member who is to work in ZeeBORN needs a user account - the crew list entry alone is not enough. The account is created straight from the crew list.
Select the person and click Create/Activate User Account. A prompt names the position and the person before anything happens.
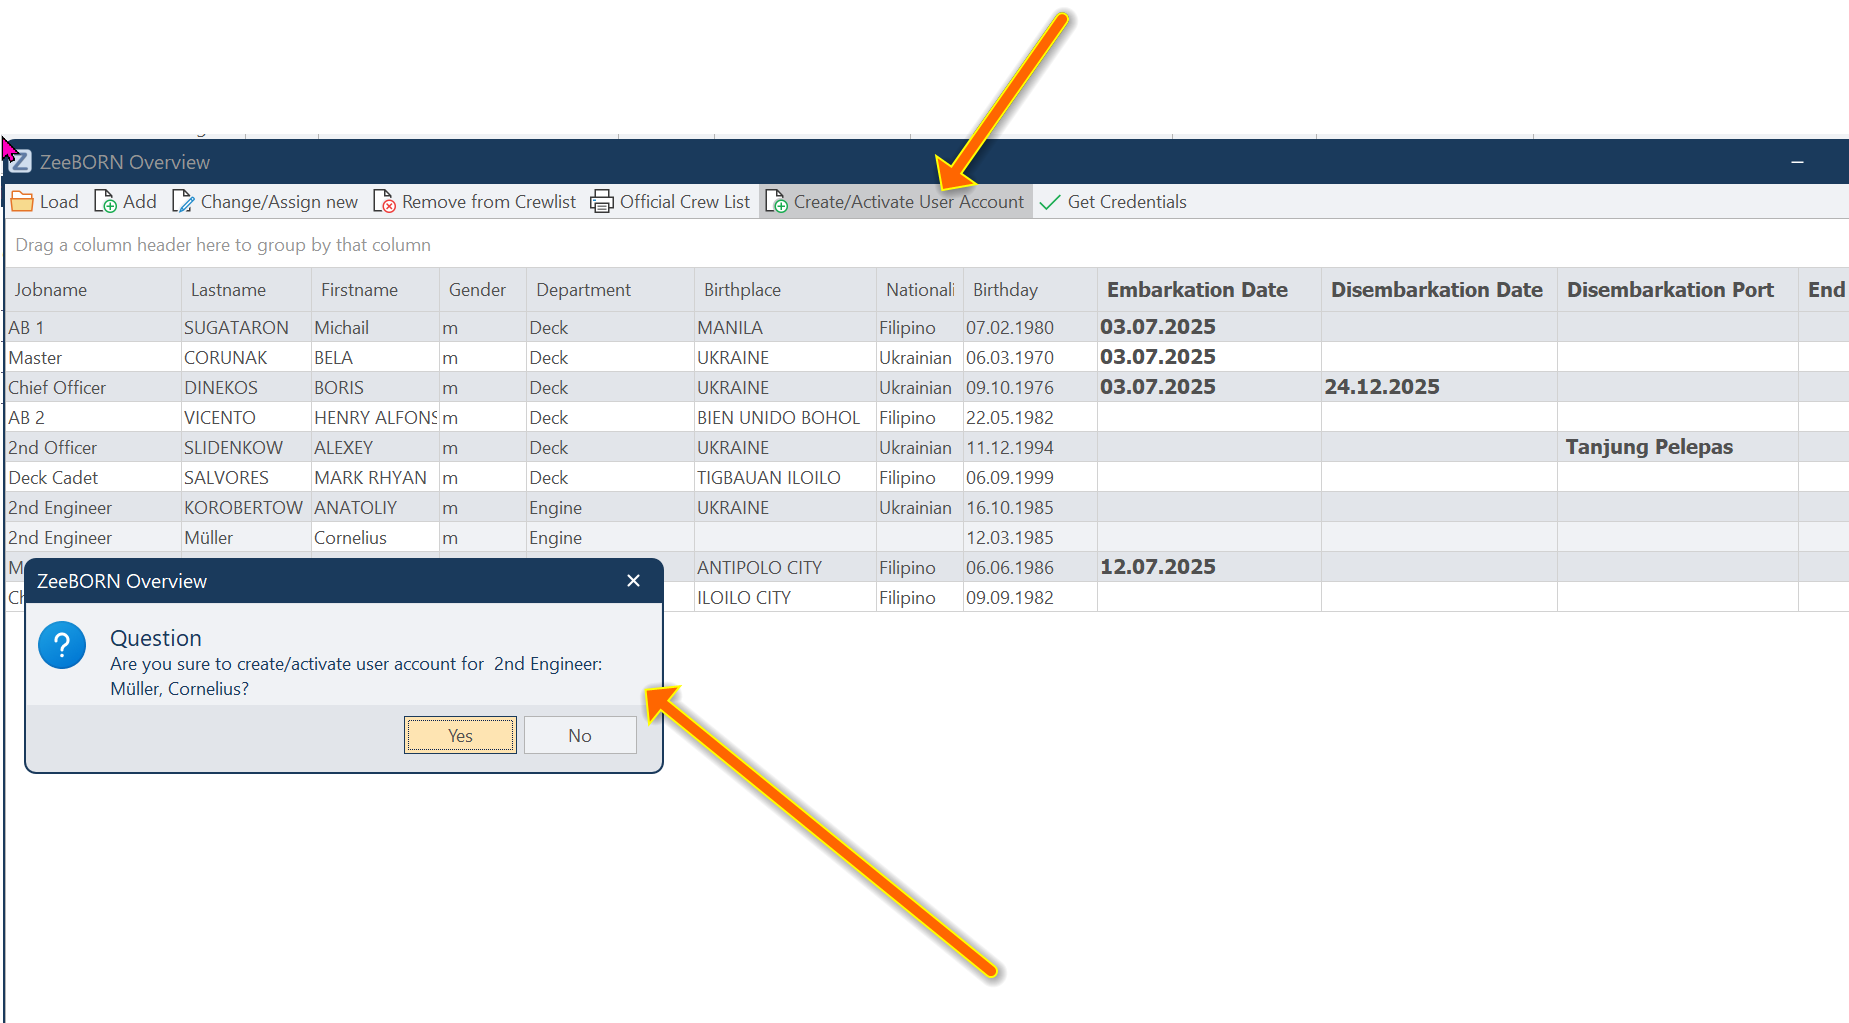
What follows depends on the person:
- They already have an account - it is reactivated and linked to the crew list entry.
- They have no account - a new one is created. The user name is formed as Last name, First name, and the role comes from the rank on the crew list.
The user dialog
Where details are still missing - no password yet, or a role that no longer matches the rank - the user dialog opens so they can be completed. Name and display name are already filled in from the crew list.
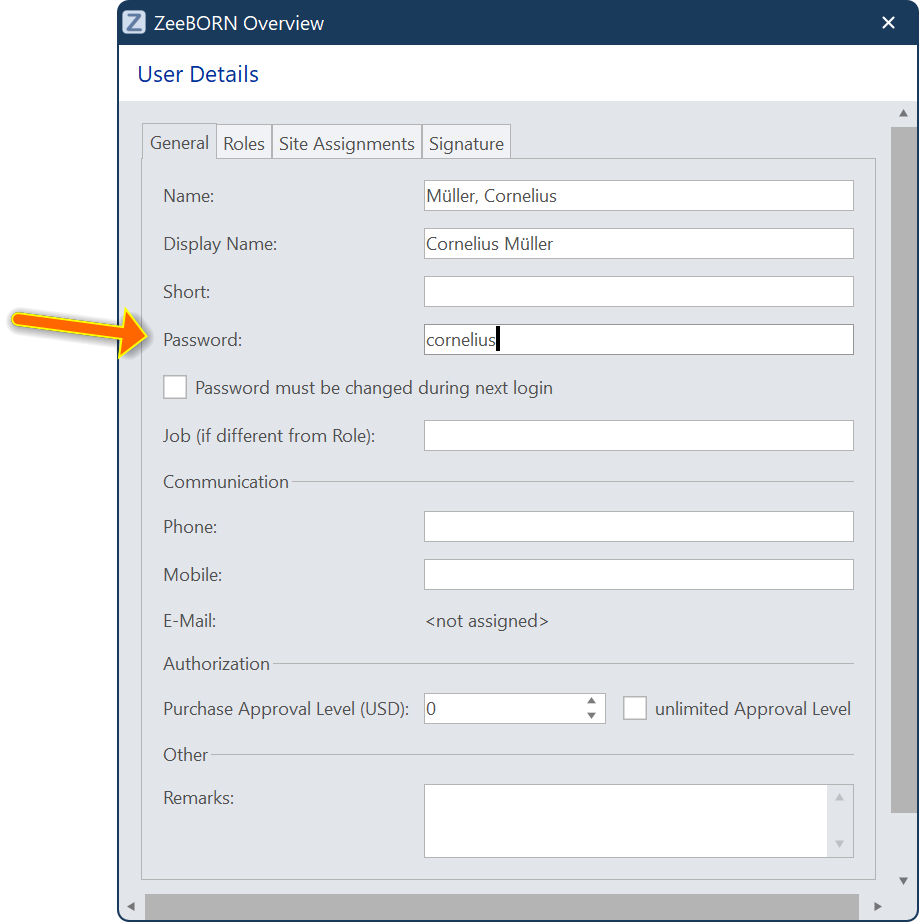
The password is empty and has to be entered here - this is usually the reason the dialog appeared in the first place. Set one, and tick Password must be changed during next login so the crew member replaces it with their own the first time they log in.
The other tabs hold the roles, the site assignments (which vessels the person may see) and the signature. For the roles themselves, see User Management.
Where the credentials appear
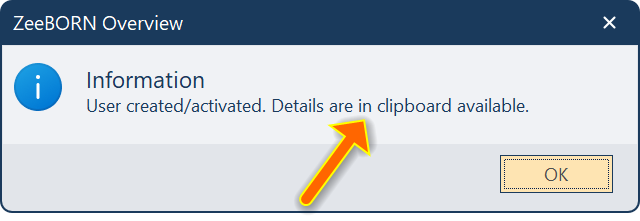
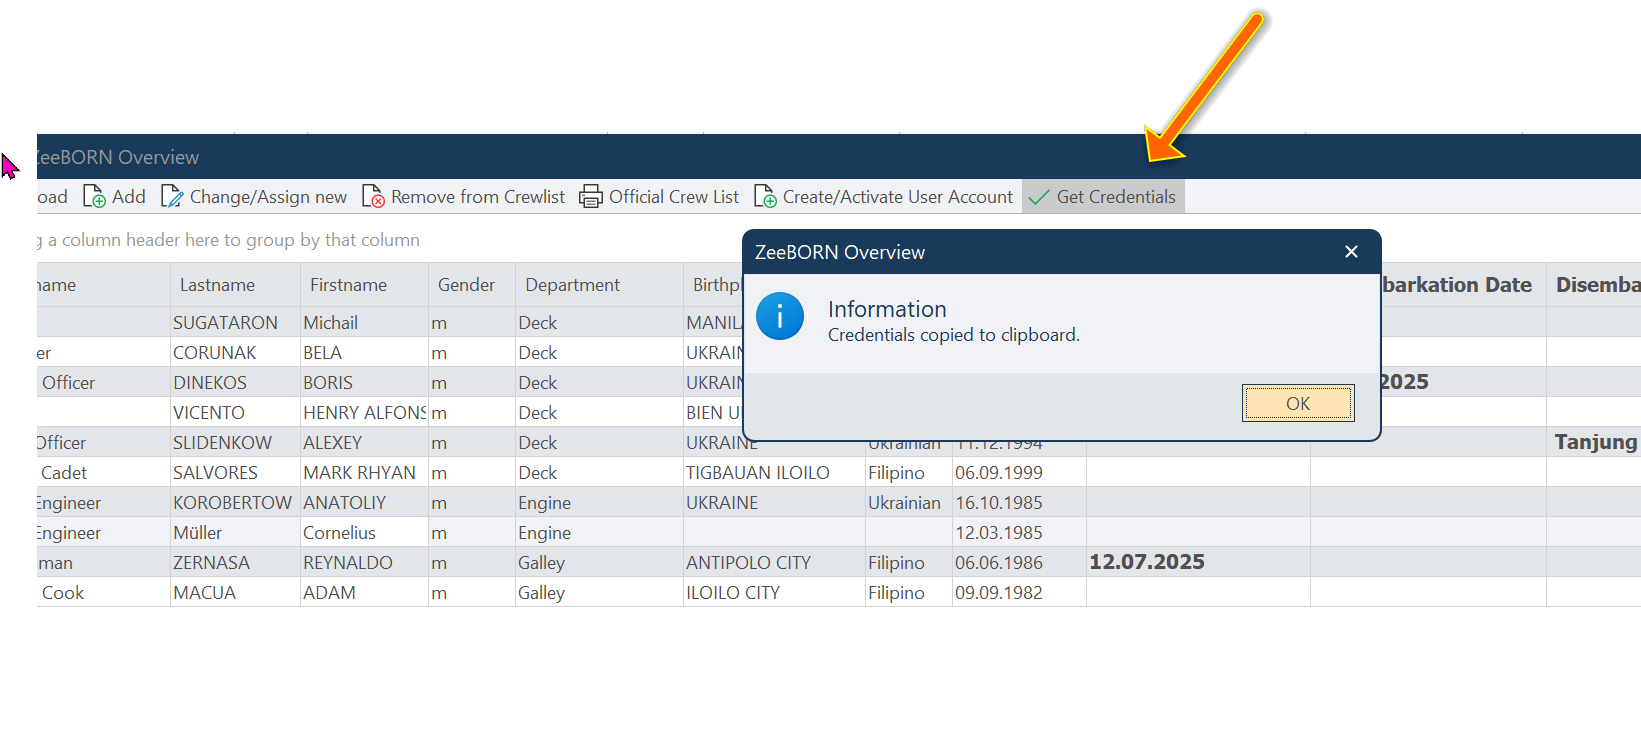
The credentials are on the clipboard, not on screen
The message says it plainly: user name and password are placed on the clipboard. Paste them where you need them - into the message to the crew member, for instance - before copying anything else, or they are gone.
Retrieving them later works with Get Credentials: select the person, click it, and user name and password are back on the clipboard.
If the person has no account yet, a warning appears saying to use Create/Activate User Account first.
Creating and activating user accounts requires a permission of its own. If the button is missing, the logged-in user does not hold it.
Keeping the account up to date
Two situations need attention, because crew list and account can drift apart:
- The person changes rank. The role follows the rank, so a changed rank means the account should be checked. Create/Activate User Account on the same person picks the mismatch up and opens the user dialog.
- The person returns after a break. No new account is needed - the existing one is reactivated the same way, and the credentials can be retrieved with Get Credentials.
Printing the crew list
This is what the authorities see, so it deserves a moment before the vessel arrives.
Official Crew List produces the printed list. It is available both in the crew list itself and in the Overview module. A dialog appears first:
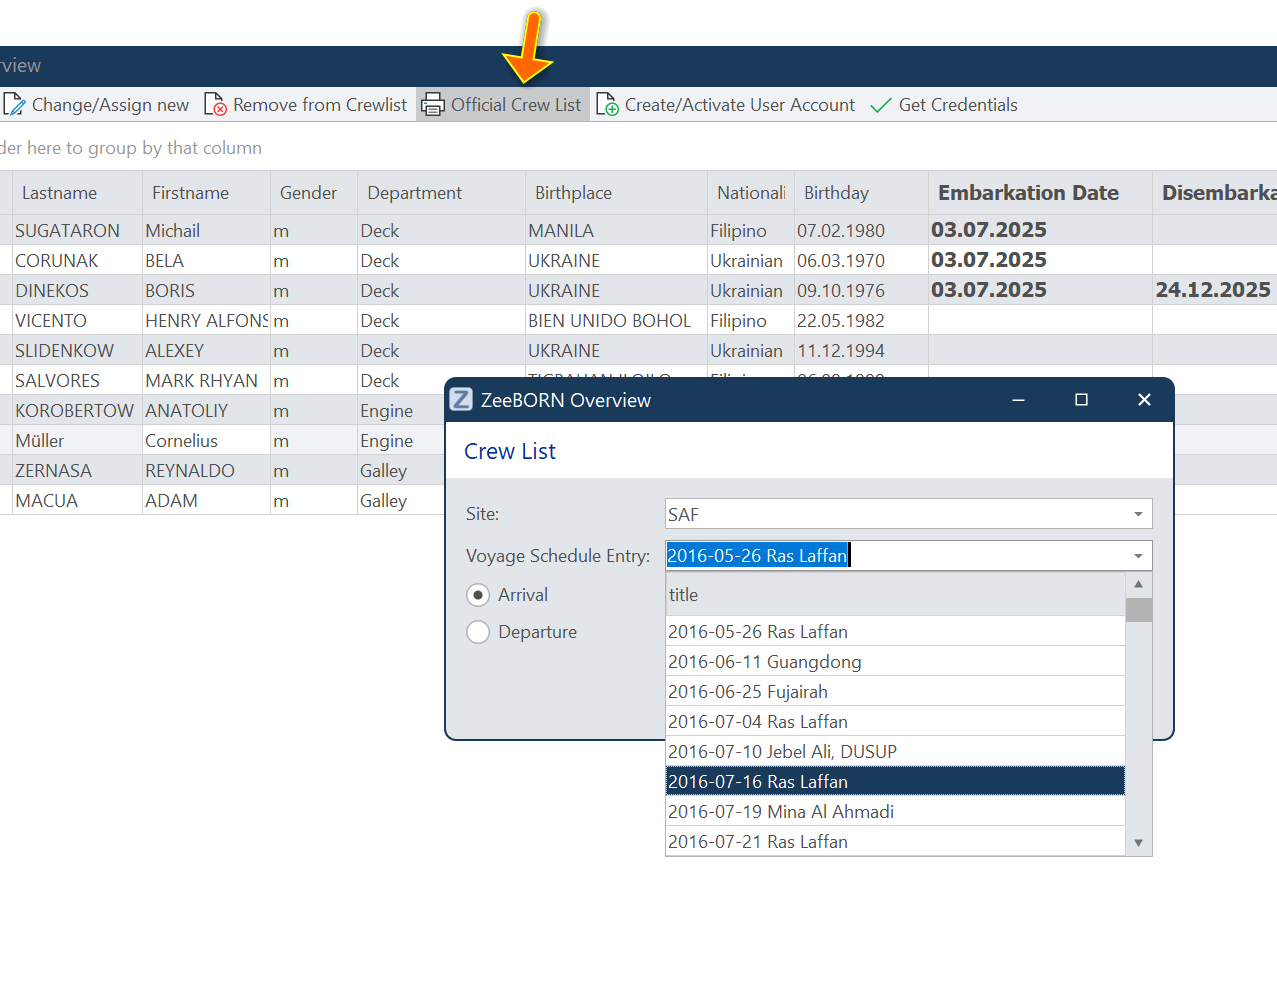
The list then opens in a preview window and prints in landscape format.
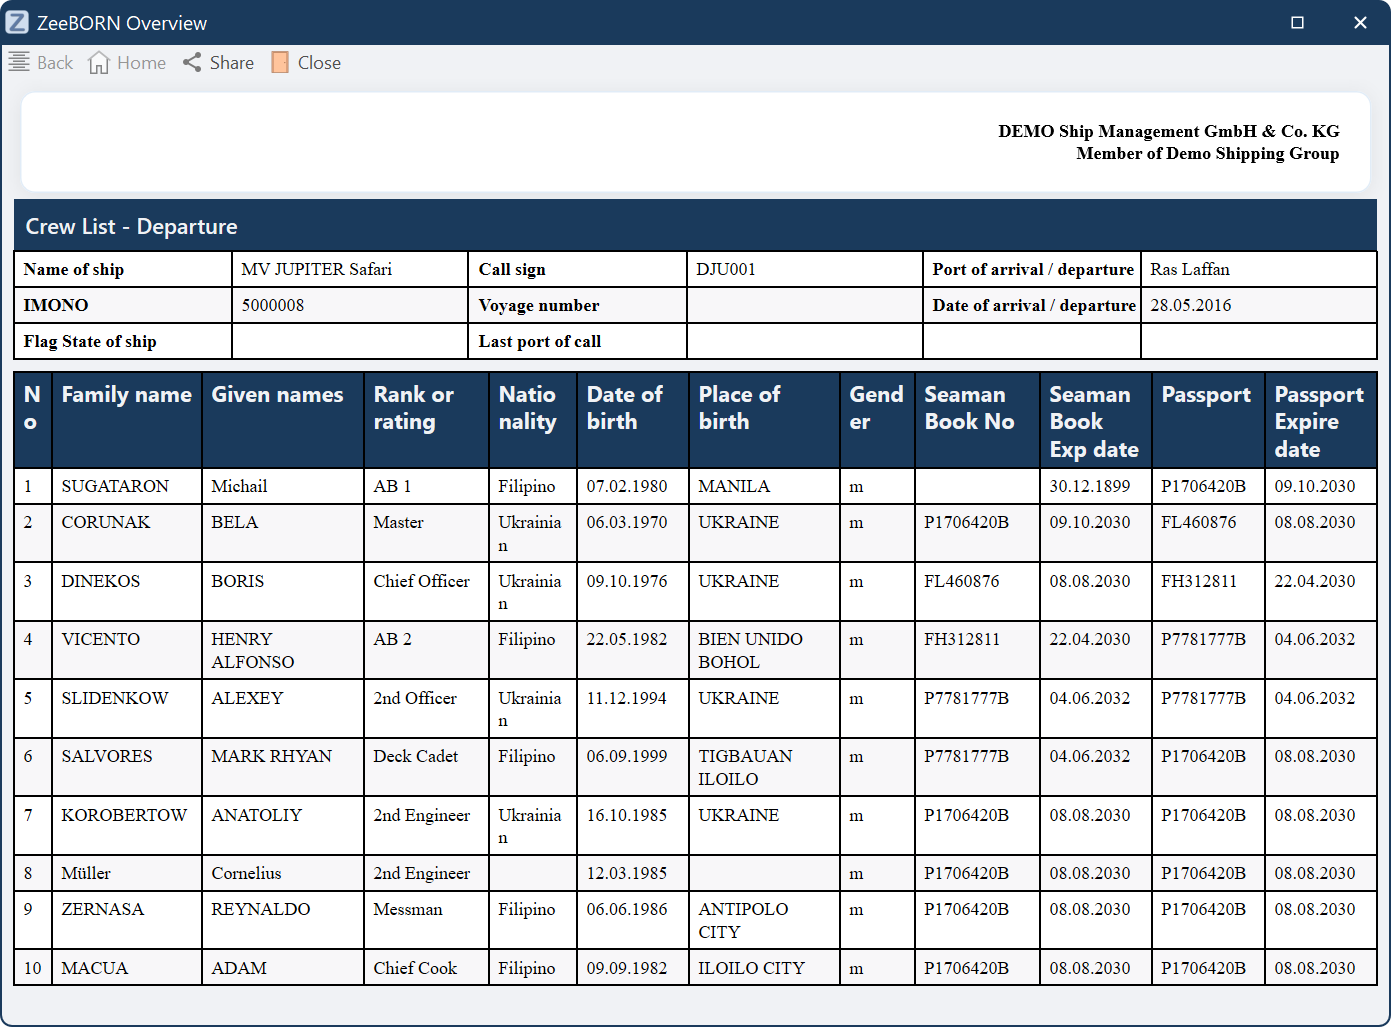
Besides the names and ranks it carries date and place of birth, nationality, seaman's book and passport with their expiry dates - which is why it is worth entering those when the person is created rather than when the list is needed. Anything missing there simply stays blank on the printed list.
Check the dates before printing
The printout takes the people and dates as they stand on the crew list at that moment. Someone who has already left but still carries no disembarkation date will appear on it; someone who joined without an embarkation date may be missing. Correcting the list afterwards does not correct a printout already handed over.
Upload Crew List in the Overview module is something different: it transfers the crew list to the web portal, not to a printer.