Create RA
NEW RISK ASSESSMENT
To create a new risk assessment, you can either copy from template (if your company works with templates) or create new from existing or new operation.
Copy from Template
To copy a risk assessment from template, select needed operation in templates folder and hit the button “Copy”. The new created risk assessment will be available under folder “Risk Assessments / Open”. All values (e. g. hazards, risk levels etc.) included in the template will be copied to the new risk assessment. When copying a template, the date is first set to the current date and thus the TAN is created. When editing the RA, this date can be changed – the TAN then changes automatically. A change of the date after “Assess on board” is no longer possible. Attention: These risk assessments are only part of the routine, if a risk assessment for this template was requested by office once.
create new Risk Assessment
from existing operation
Hit “New Risk Assessment-existing operation” and choose Operations group. Then select needed operations. If you couldn’t find the operation hit “search” for a text search.
for new operation
Hit “New Risk Assessment-new operation”. Add operation name and give a description.
- Select "Operation Type" from list. Now select the operation group or insert a new operation group.
- If "Operation Type" is not available in list, add new "Operation type" and new "Operation group".
Depend on configuration up to five tabs can be in the report: Risk Conditions, Hazards, Further Actions, Authorization and Attachments.

Tab Risk Conditions
Depend on configuration different data will be shown. Fill in all relevant data.
Tab “Hazards”
Click on Tab “Hazards” and prepare the relevant data.
- Add: A hazards from the list can be added.
- Enter new Hazard: A new hazard can be insert in system.
- Edit: Choose a hazard and this hazard can be edit.
- Delete: The button is only visible with the relevant right. The selected hazard with all corresponding information will be deleted.
Working directly in the list
The most frequent changes can be made in the list itself, without opening the hazard first:
- Likelihood and Severity are picked from a drop-down — for the hazard as well as for the existing and the additional measures. Only the entries of the risk matrix assigned to this assessment are offered.
- Existing Measures and Additional Measures can be typed straight into the row.
The Risk Level does not have to be set by hand; it follows from likelihood and severity and is updated as soon as one of the two is changed.
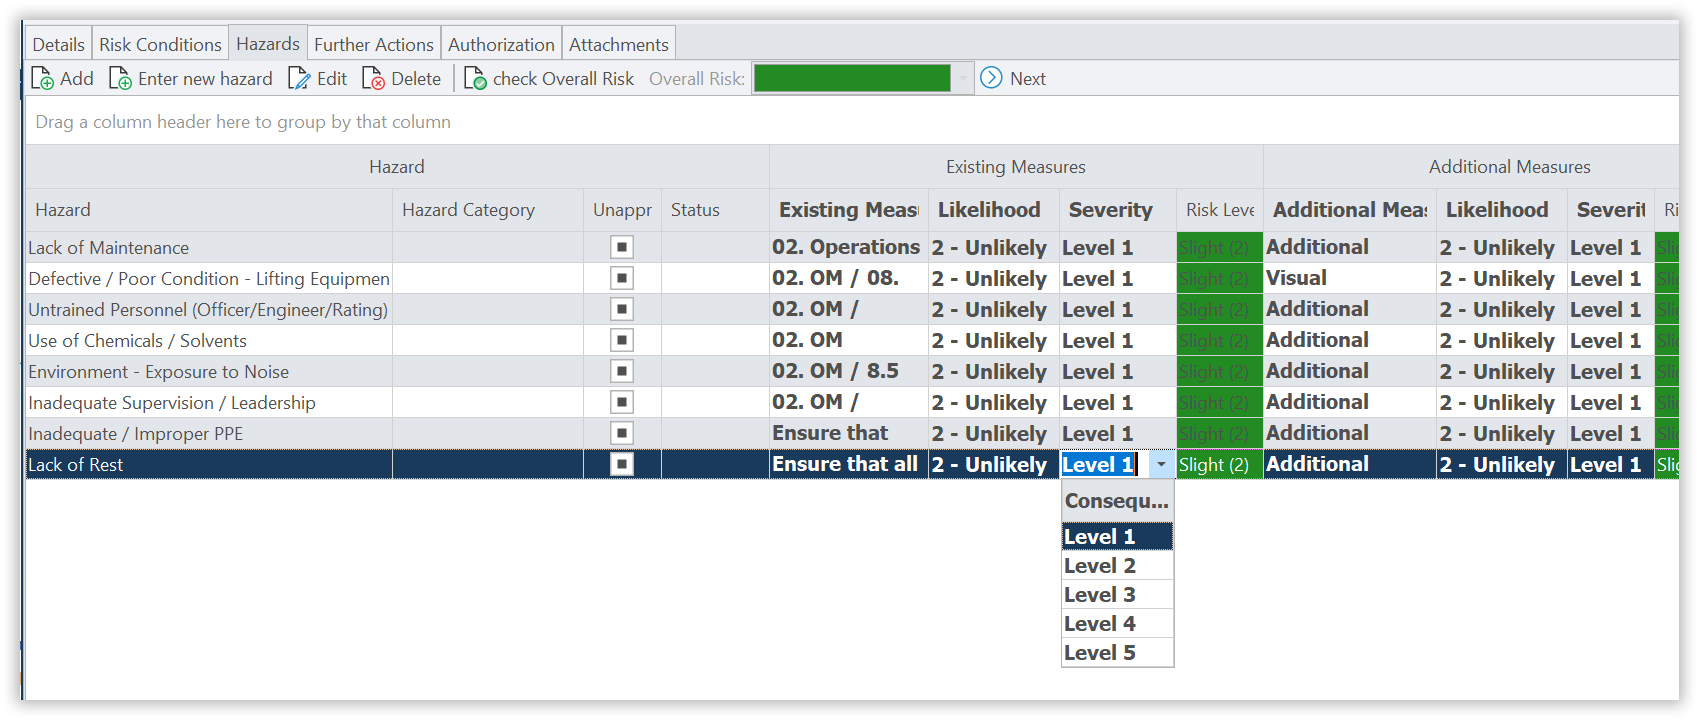
Double-clicking a row opens the full hazard dialog, for everything that cannot be done in the list.
Rating a hazard in the dialog
The dialog rates the same hazard three times, and the order is the point of the exercise: first the hazard as it stands, then what already protects against it, and finally what could protect against it in addition.
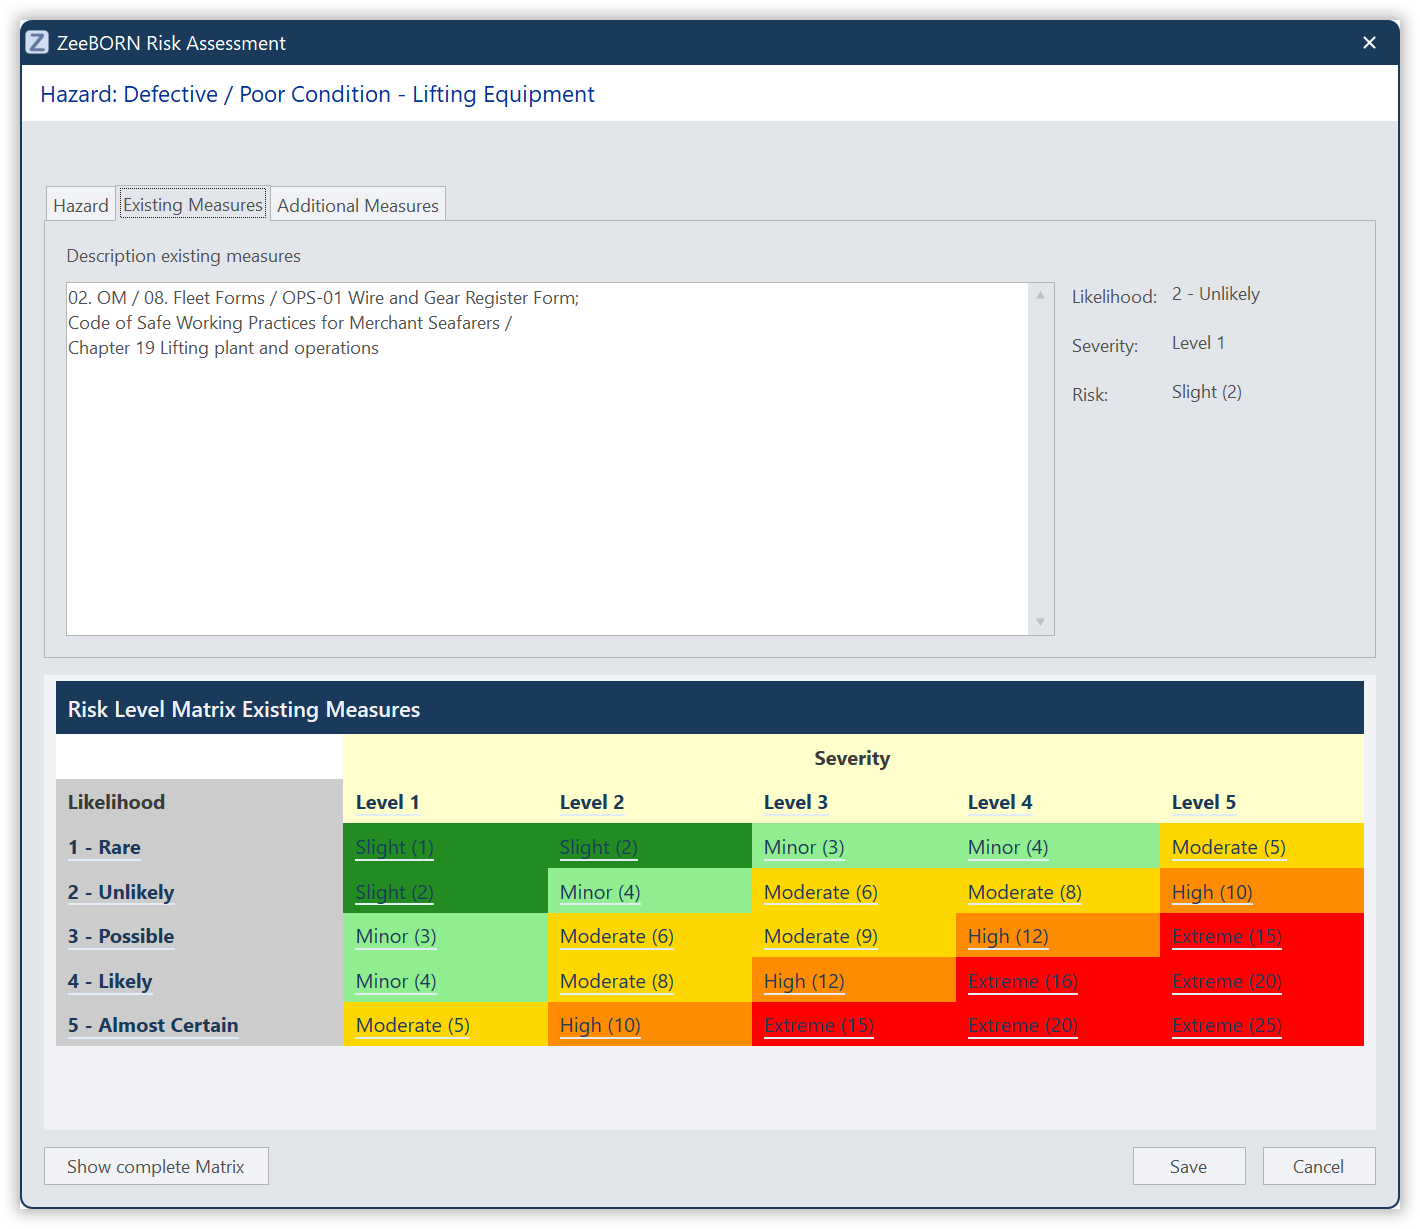
- Hazard — the hazard itself, with its description where one is stored. The description is read-only; the rating is made by picking the combination of likelihood and severity from the risk matrix.
- Existing measures — what is already in place, rated again. This is normally where the risk drops.
- Additional measures — optional. Where the remaining risk is still too high, a proposal is described here and rated once more, which shows what the measure would achieve before anybody decides on it.
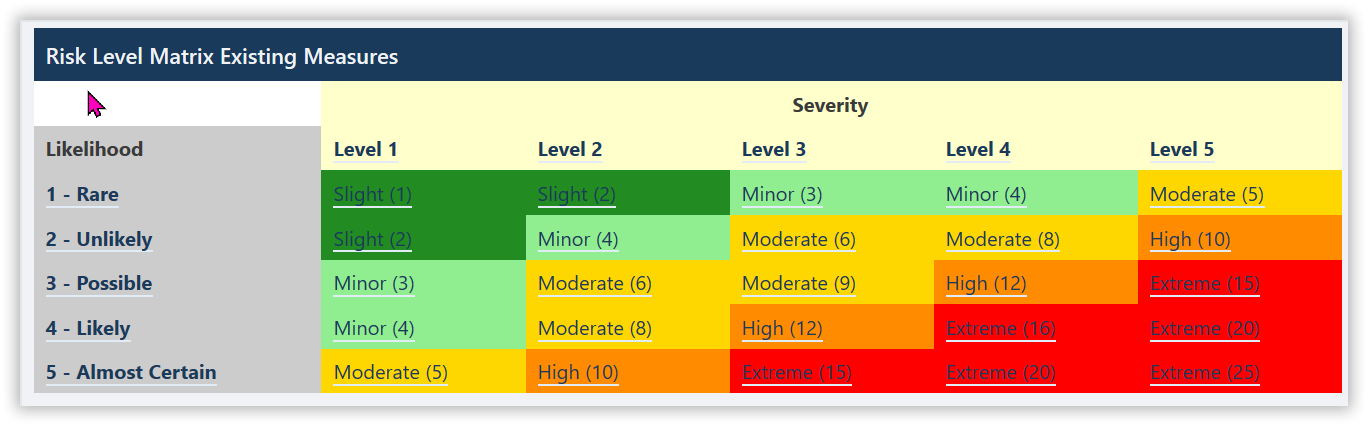
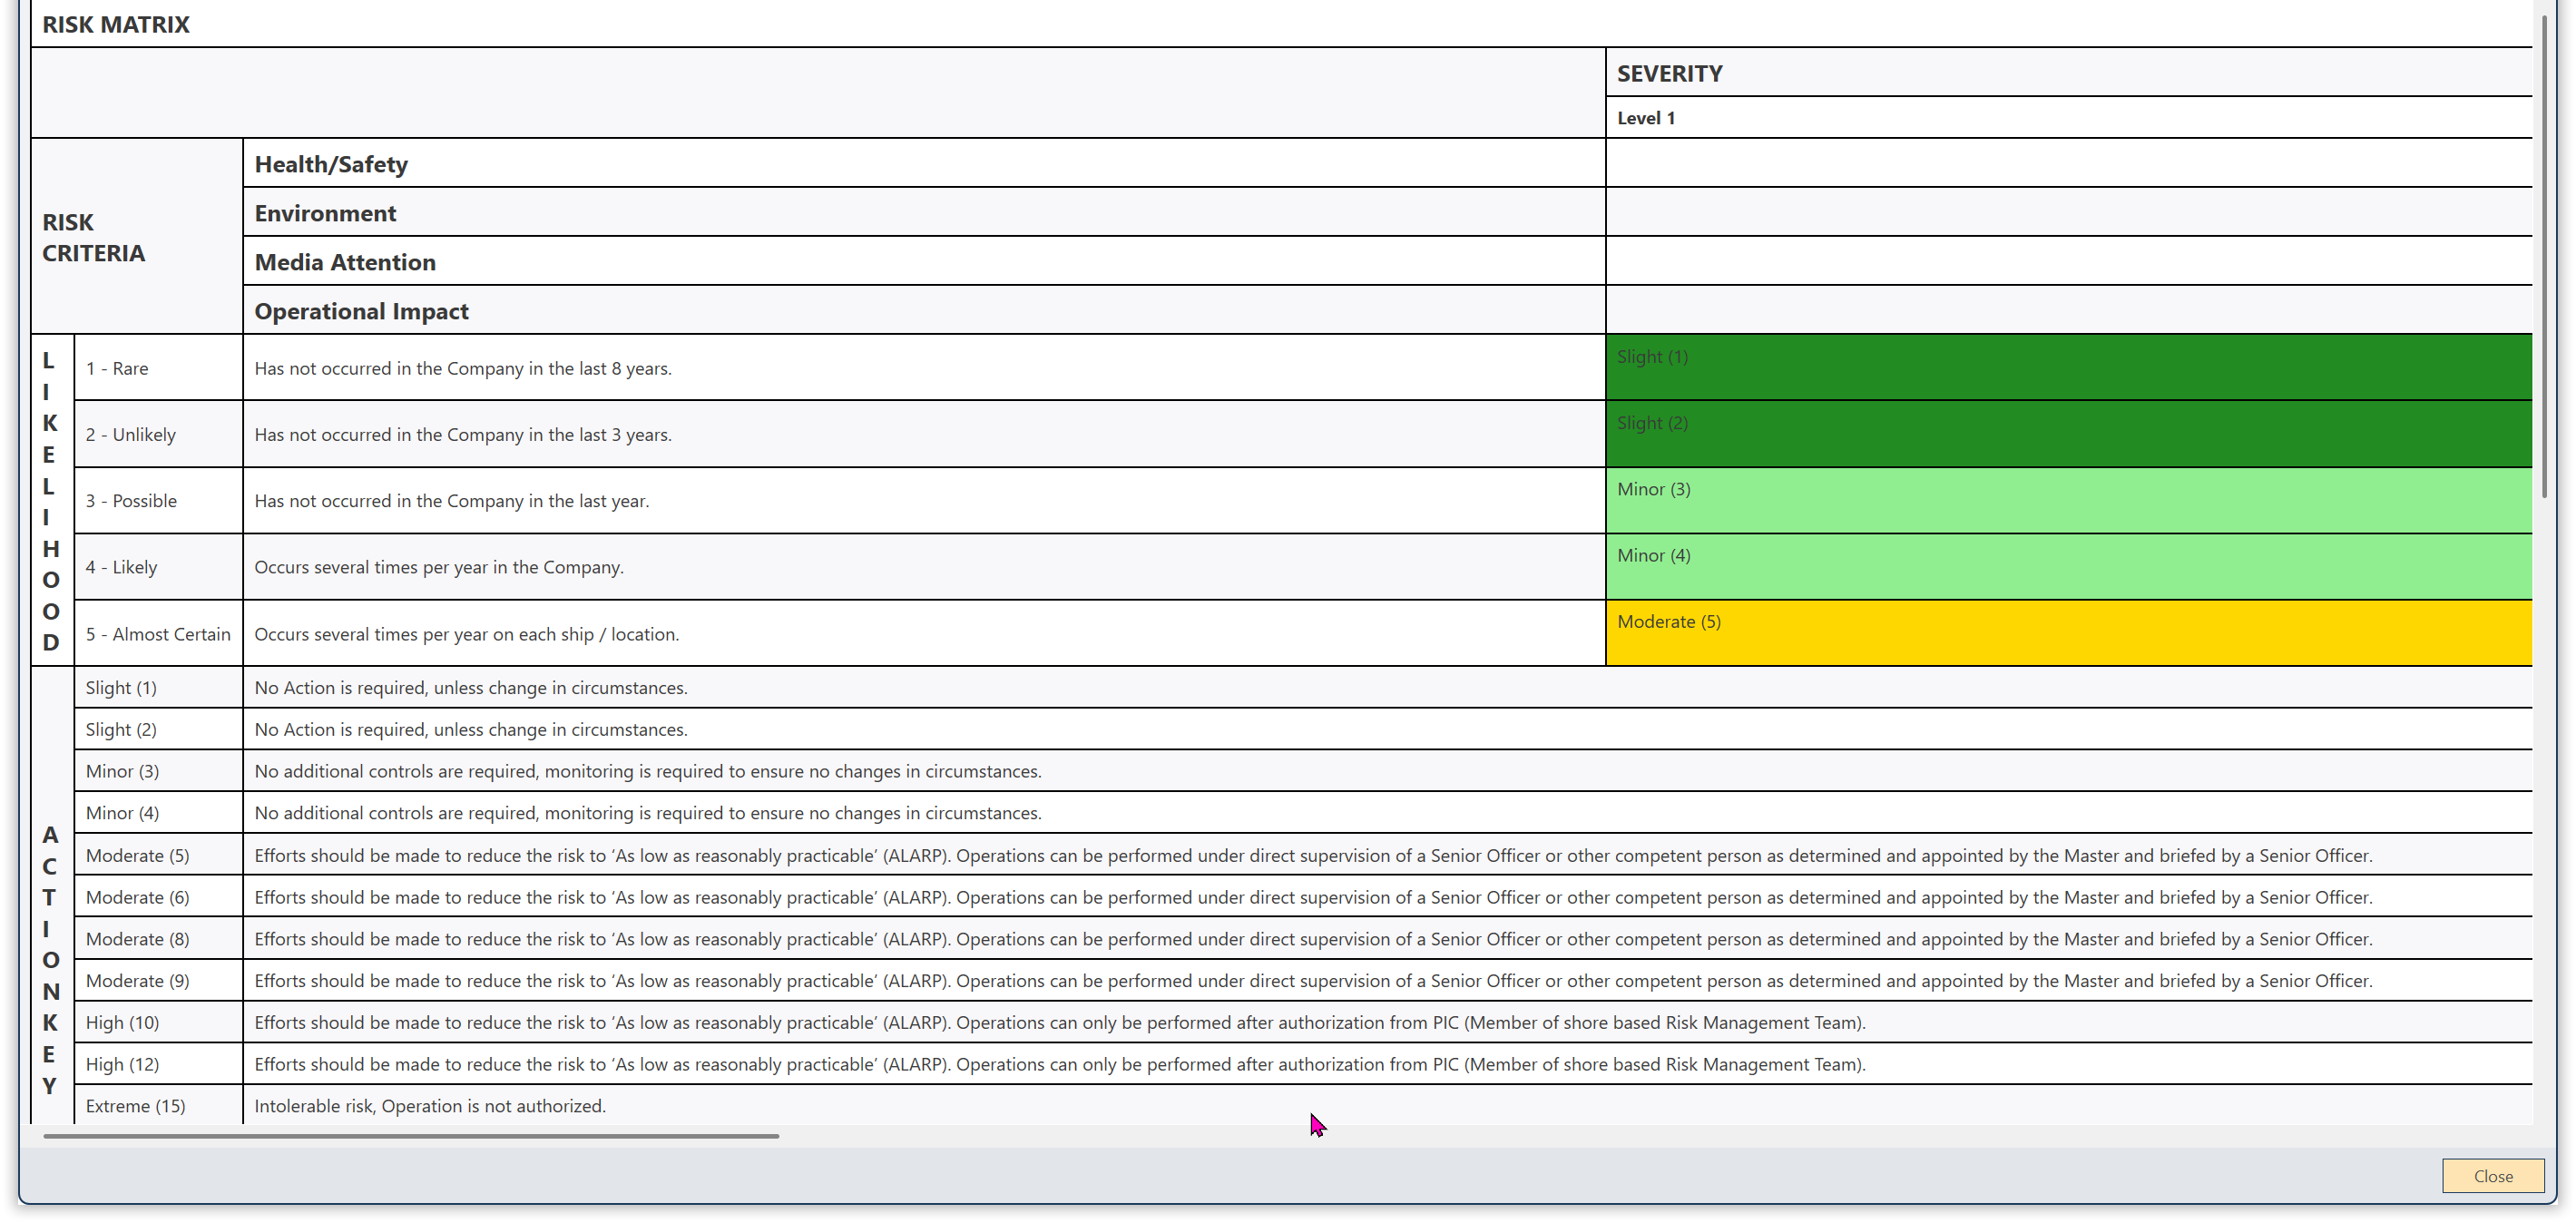
Clicking a likelihood or a severity shows the explanation stored for it, and Show complete Matrix opens the whole matrix with all its explanations — useful when the difference between two neighbouring levels matters.
Hazards can be added, changed and deleted for as long as the assessment has not been assessed. Afterwards they are fixed.
Tab “Further Actions”
Further Action can be added as free text.
Tab “Authorization”
If the RA has to be authorized, the needed information about authorization and review can be added in this area. If the name is in the system, please use “select name”. If only the position is needed, please use “select job name”. For all other people, please use “enter name”. Insert date, per default is the actual date filled in.
Tab “Attachments”
(see Attachments) Attachment can be added via Drag & Drop or Attach.
Editing Risk Assessment
Now you find the RA in folder ”open”. Hit edit to handle the details.
Add Action
To each Risk Assessment Actions can be added with Add corrective/Preventive Action.
(see single tracked Actions)
Once all the data are entered, the process can be completed by hit assess.
With print official the Risk Assessment will be print in the correct form for authorities.
Office
All on board created Risk Assessments will be shown in folder "open". All RiskAssessments with status open on board will be shown with "OoB" in front. These Risk Assessments cannot be edited or approved in Office.