Supplier Ratings
General
Our system has the possibility to rate all contacts especially suppliers.
There are two possibilities for rating:
10 = very good
8-9 = good
6-7 = satisfactory
4-5 = fair
1-3 = bad
1 = very good
2 = good
3 = satisfactory
4 = fair
5 = bad
Preparation Rating Contacts
In module Contacts are two choices to set contact as relevant for
rating.
Direct at contact
- Start the module
Contactsand choose the desired contact. - Now click
Editand then clickContact Details. After this you can see on the * right side the check boxrelevant for rating.
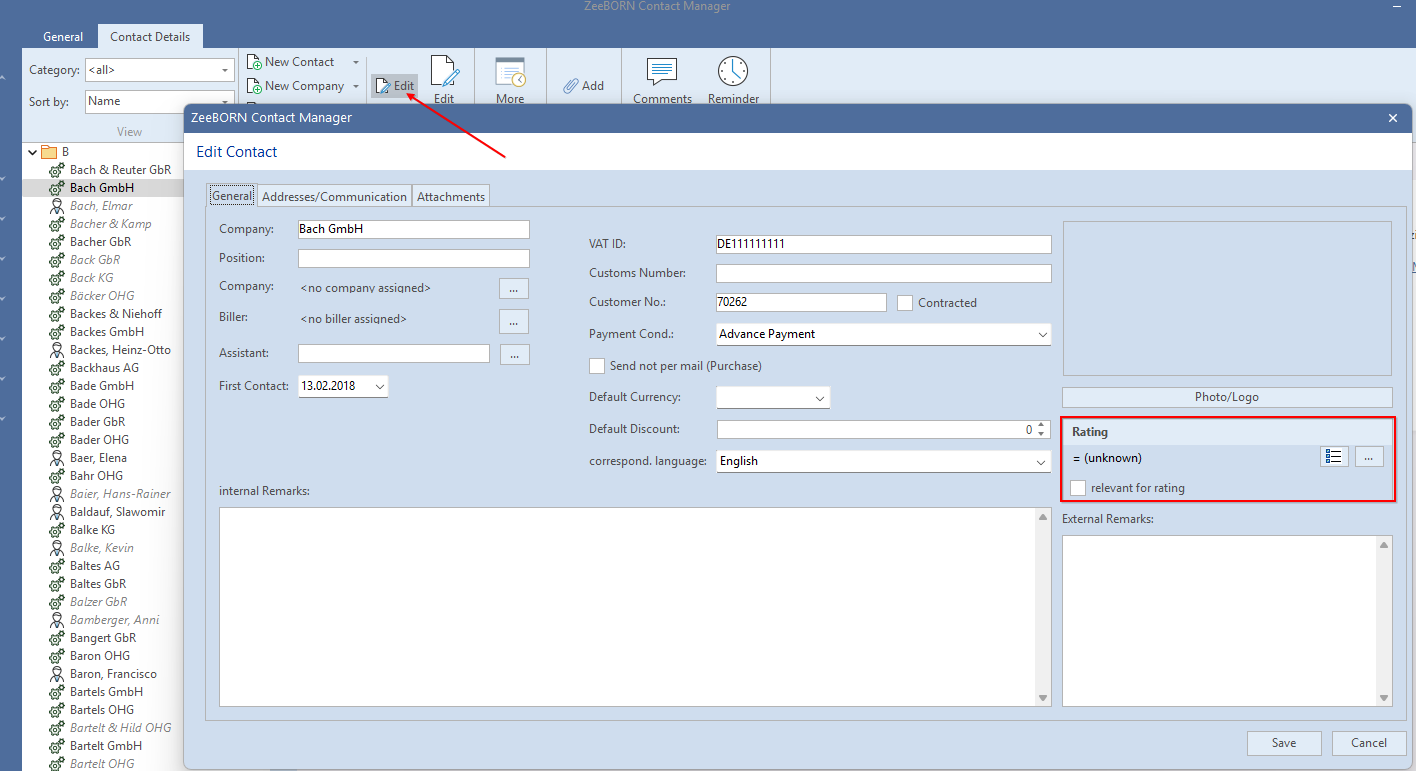
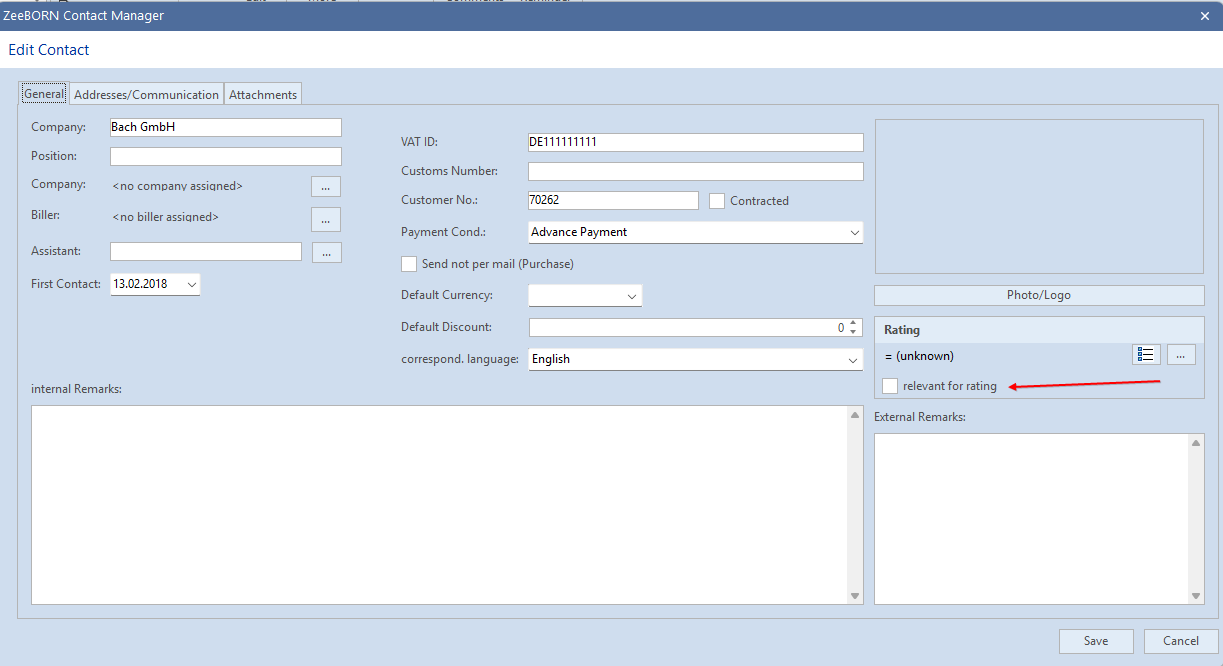
Now set checkbox relevant for rating.
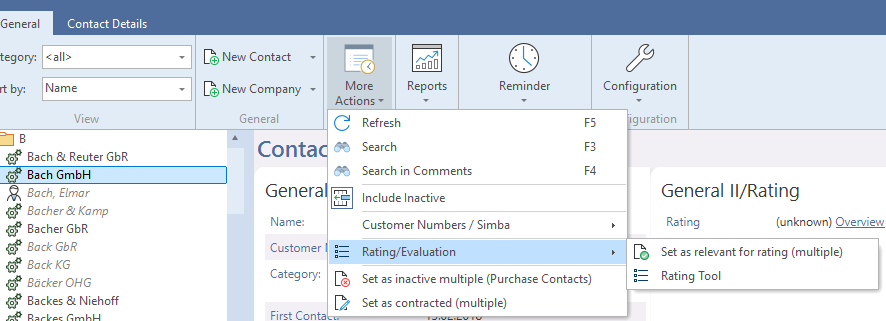
List
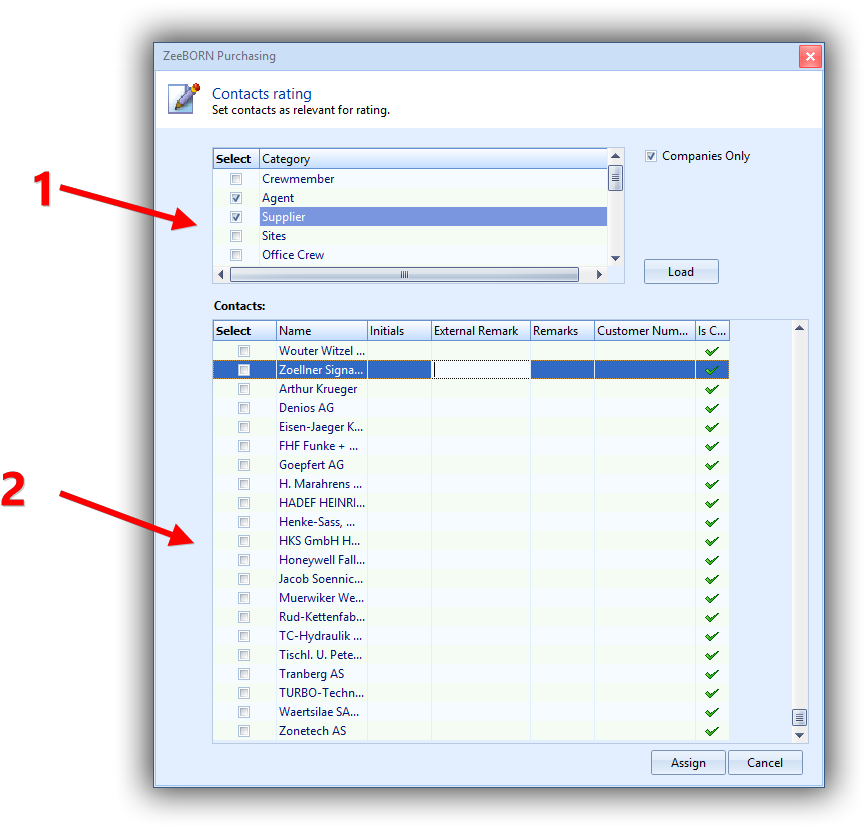
It is possible to select one or more contact categories. As per default
the system loads only companies. If person of companies are also will be
rated, hit the check box beside Companies Only.
Click on Load and all contacts will be visible. Now you can choose all
needed contacts. Confirm it with „Assign" for the activation of your
choice.
Configuration
Configuration of a Rating Interval
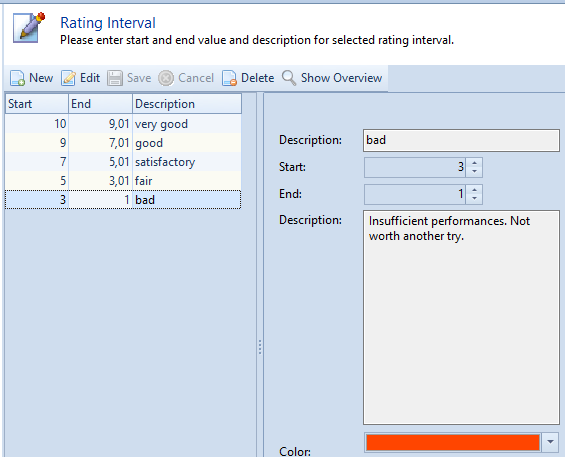
As the rating tool works with average values, in the system has to be configured what notes are included in which grades. Example: 10 -- 9,02 = very good or 1 -- 1,49 = very good
Click Manage Rating Interval and insert all average values for the
valuations very good, good, satisfactory, fair and bad. A color can be
chosen for each interval
Configuration of Warning Levels
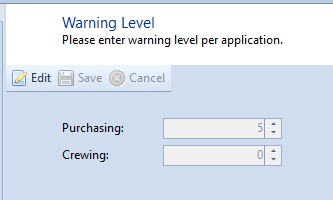
For Crewing and Purchasing a warning level can be defined. If the average rating level of a contact is lower than the warning level, by choosing this contact a hint will pops up.
Rating single contacts
To rate a contact, you have to start the module Contacts and choose
the required contact from the list. Or if you want to rate a supplier,
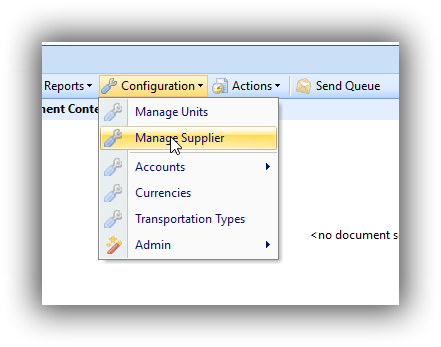
so you have to start the module Purchasing. Click on Configuration
and choose Manage Supplier and then choose the required supplier.
Click Edit and choose Contact Details.
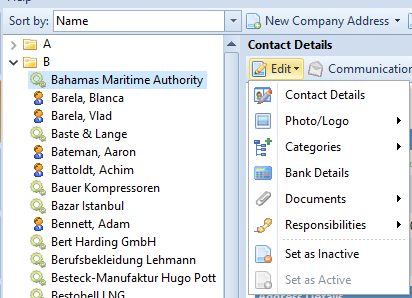
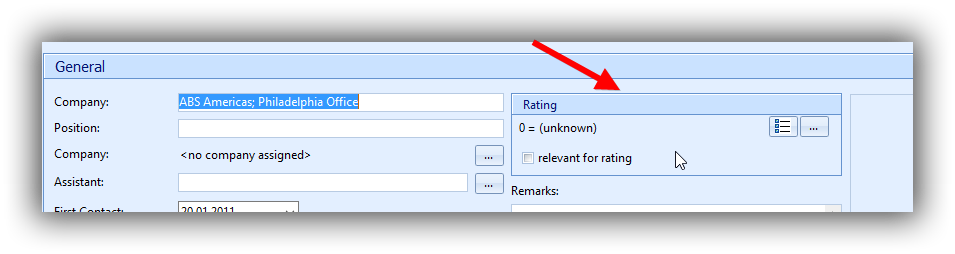
On the right side upper you find the rating:
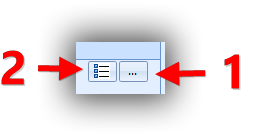
Button 1: Rate Contact
Click the button Rate Contact and the following form appears.
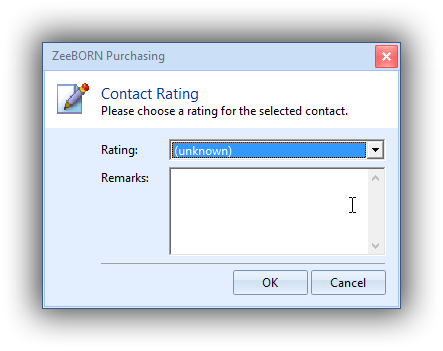
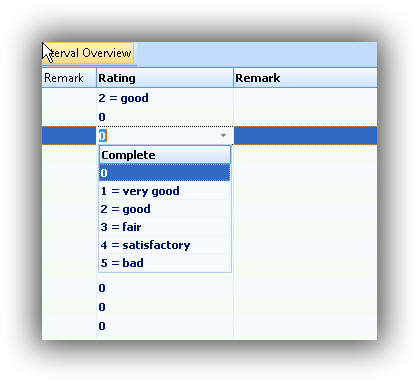
Choose the needed rating and write a remark. The remark is not mandatory.
Only if you rate with (bad) the remark is mandatory.
Confirm with OK. The contact details will be updated.
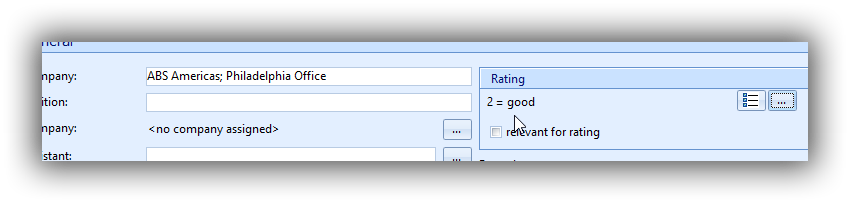
In HTML screen also.
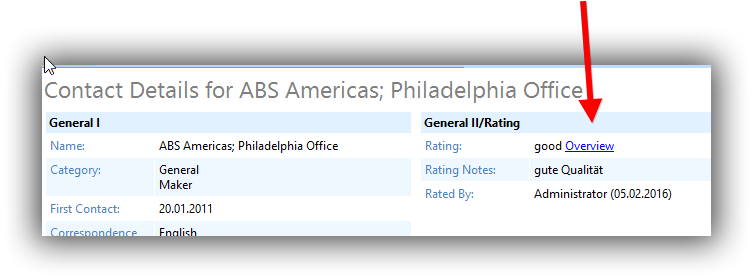
Button 2: Rating History
Click the button Rating History for the overview of the rating:
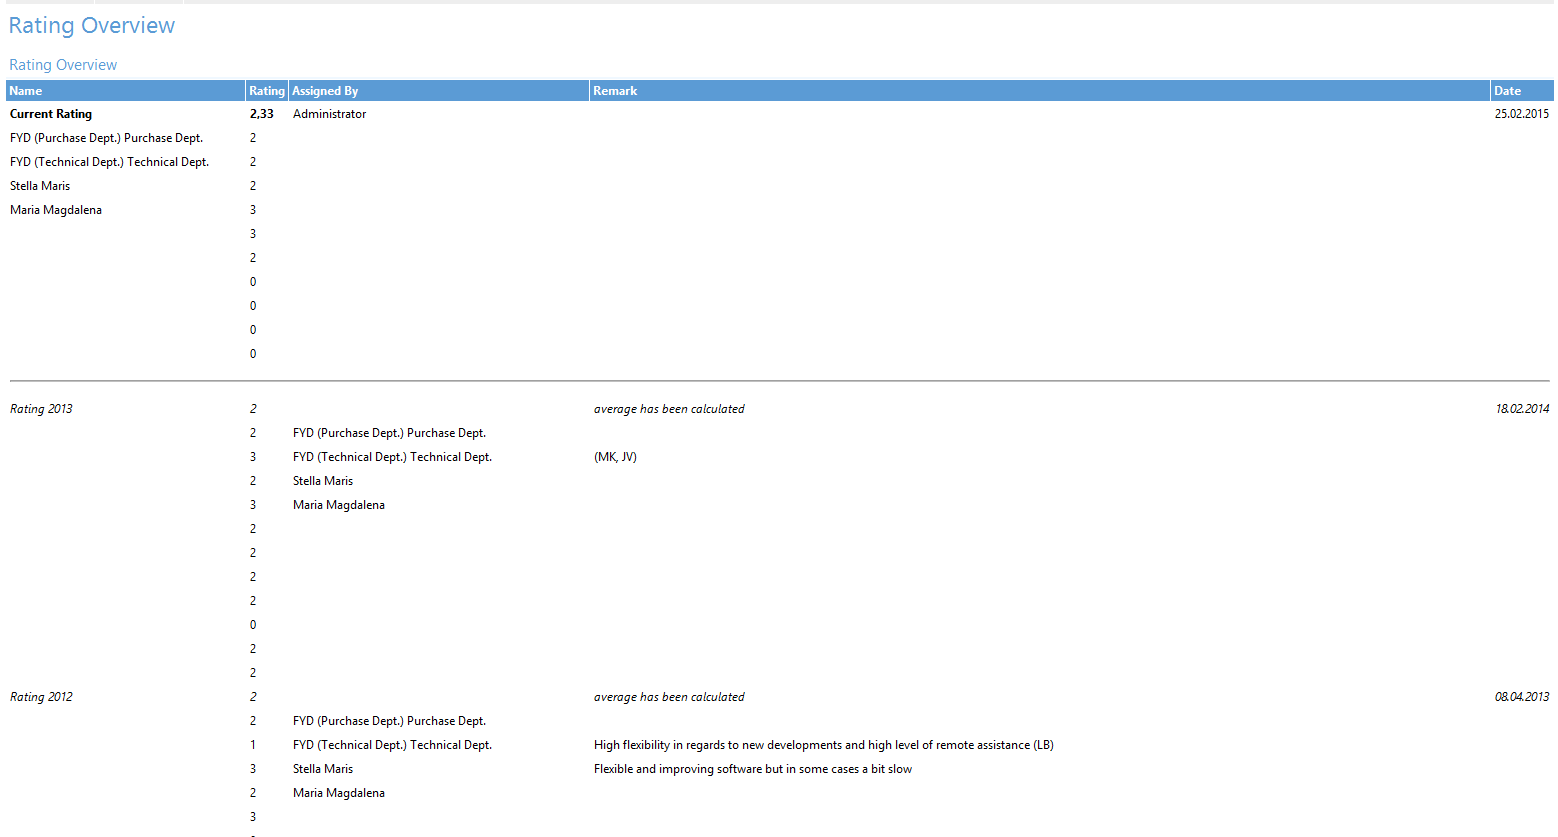
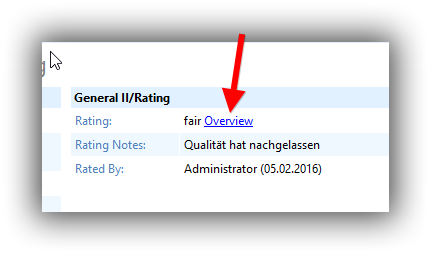
The history is also in HTML screen callable.
Usage Rating tool
It is also possible to use the ZeeBORN RatingTool.
Pro: More people can rate and the average about all will show for this rating. The crew onboard has also the possibility to use this RatingTool.
In one step all needed supplier can be rated from the whole company.
If you have the relevant user right go to Tab All Modules and choose
RatingTool.
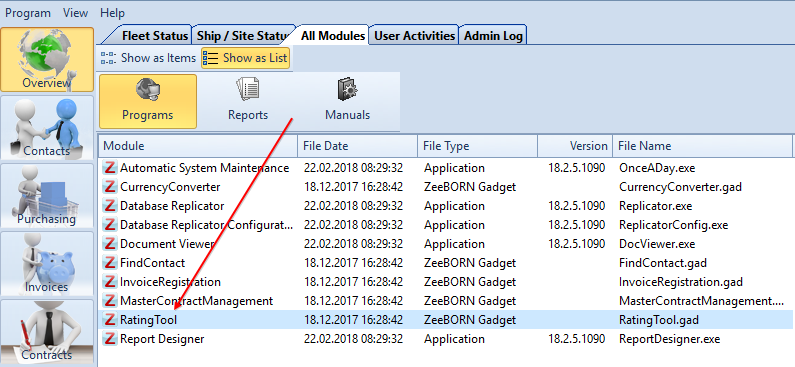
Start of a Rating Process
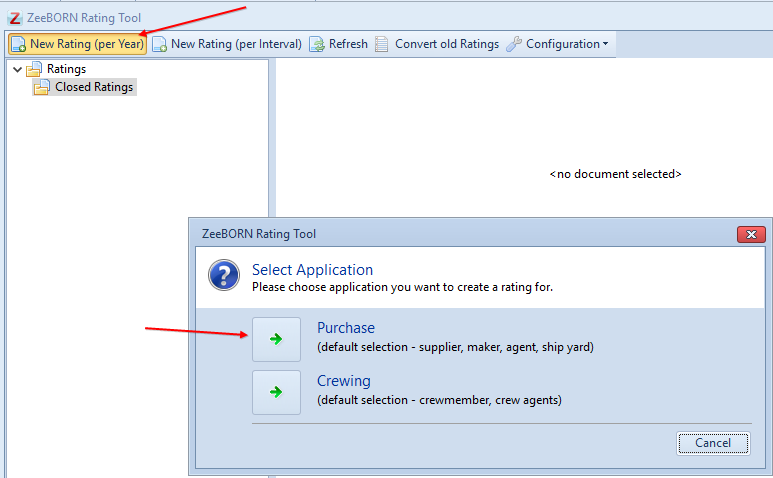
Click on the Tab New Rating (per Year) or New Rating (per Interval)
and choose application you want to create a rating for:
Purchasefor rating Purchase relevant contacts e.g. supplier, agent etc.
or
Crewingfor rating Crewing relevant contacts e.g. crew member, crew agents etc.
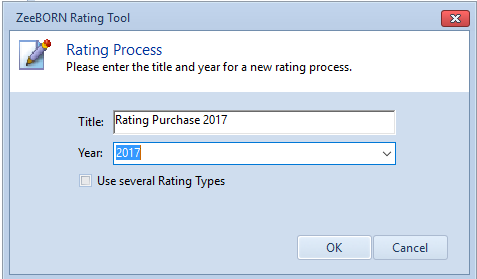
Next step insert Title and choose year. Confirm with
OK.
Now the rating is visible in the tree.
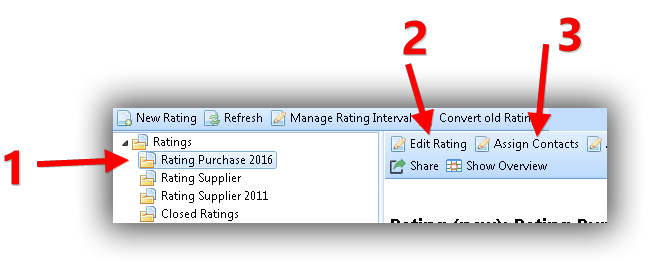
The title can be executed with Edit Rating (2).
Add a Contact
To prepare the rating click Assign Contacts (3).
Categories
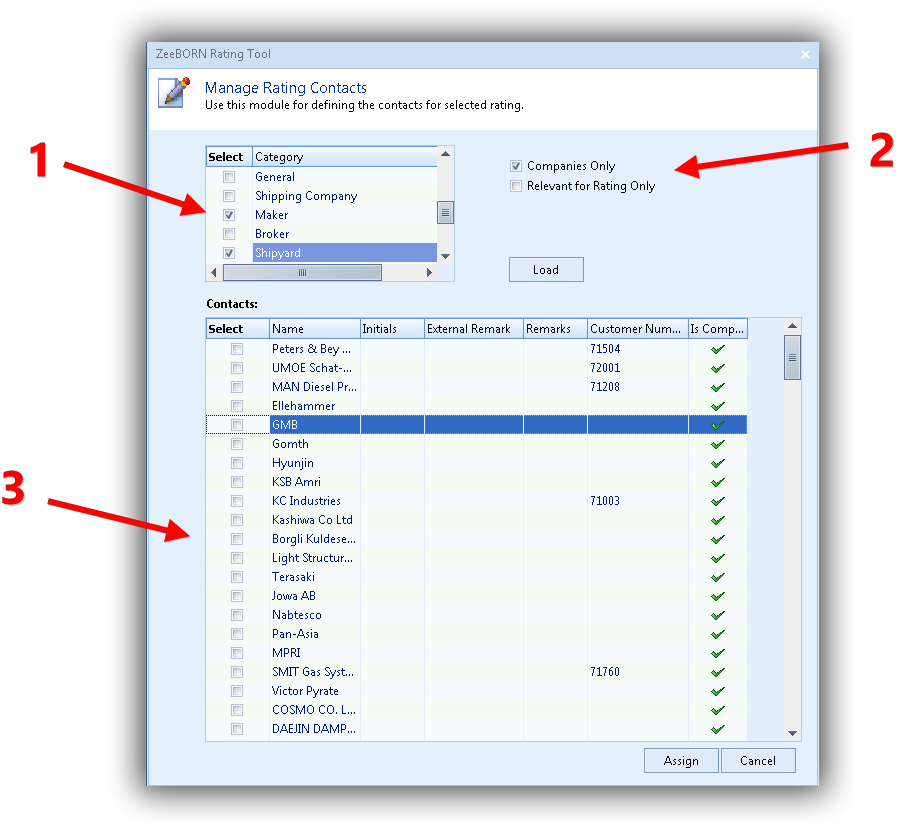
For Purchase relevant contact categories are already set as default (Maker, Shipyard, Supplier, Agent) (1) -- other categories can be added.
Option
There are three check boxes.
-
Check box
Companies Onlyis set: only companies will be displayed. -
Check box
Relevant for Rating Onlyis set: only contacts marked as relevant for rating will be displayed. -
Check box
PO availableis set: here is a general note that there are PO available (no details to specific PO).
However, you have the possibility to mark a supplier as Relevant for Rating - so that you can select which supplier will be rated. This will
make the process faster and easier during the preparation. If you know
that not all of suppliers are be rated but always the same contacts, it
makes sense to run this pre-selection. Now the entire supplier list (3)
will display only contacts relevant for rating. You can also select
contacts from this list or select the whole list. To select all contact
hit with the right mouse button on Select and choose Select All.
In HTML screen of the rating process the selected contacts are visible.
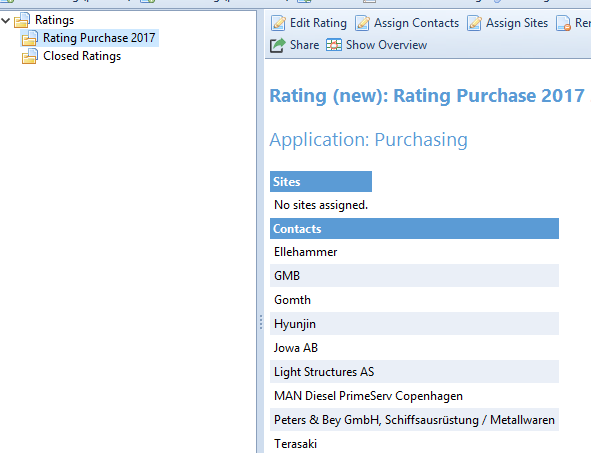
Add rating people
Now assign all rating people. For that click the button Assign Sites.
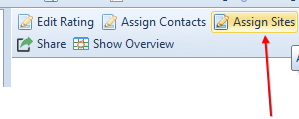
In the displayed screen all sites and departments can be chosen.
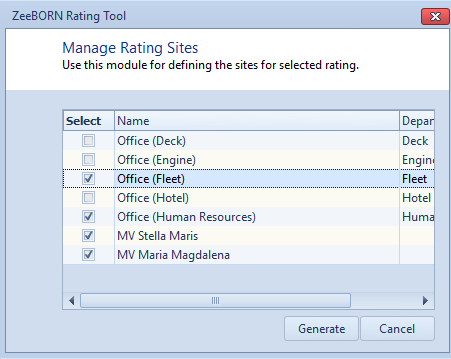
At the moment a ship is one „rating people" and will be not separated in departments. In the office all departments from the ranking list will be displayed and can be chosen.
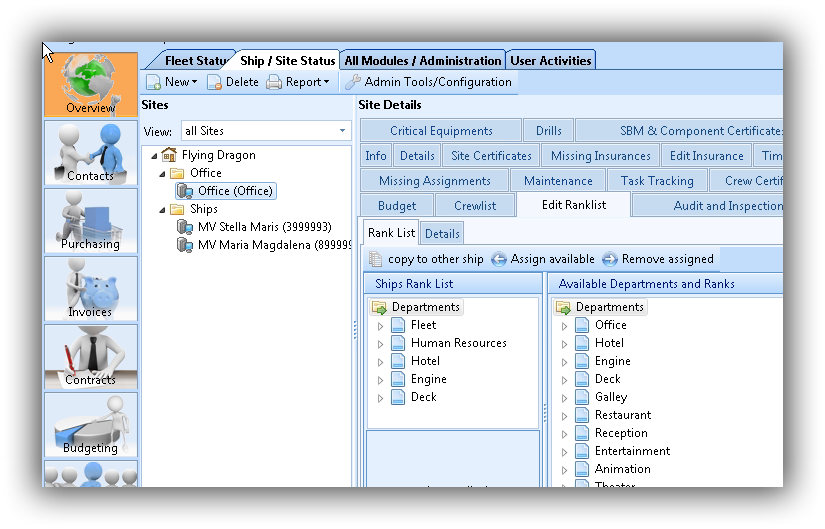
To add a department in the office, please select Office and go to tab
Edit Ranking List and assign all needed departments. (All departments
have to be added in configuration.)
Now in HTML screen also the rating departments and sites are visible.
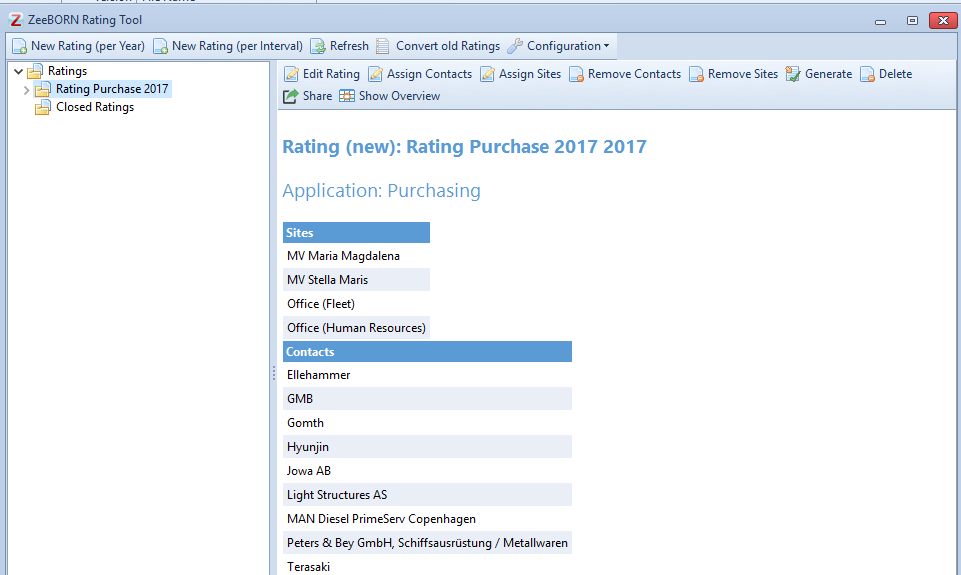
If are wrong departments or sites added, click on Remove Contacts or
Remove Sites to delete them from rating process.
Create a rating process
Click on Generate and the rating will be created.

Important
From now no more changes on data of the process (selected supplier, rating people) are possible.
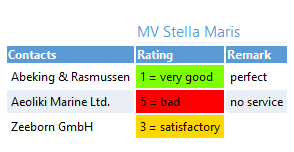
Now HTML screen will be displayed as a matrix.
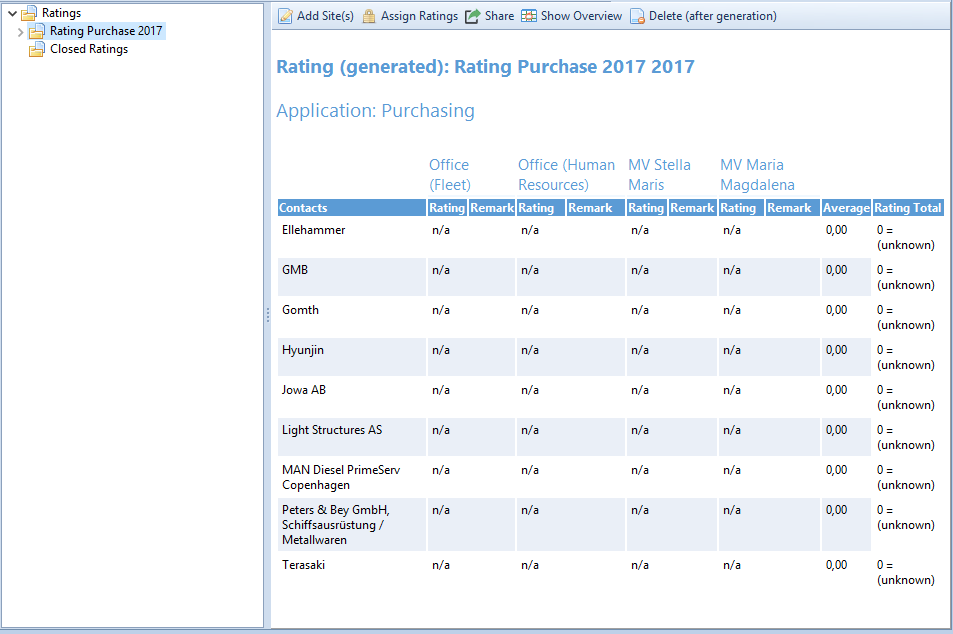
Below the overview the single rating processes from sites and departments are visible.
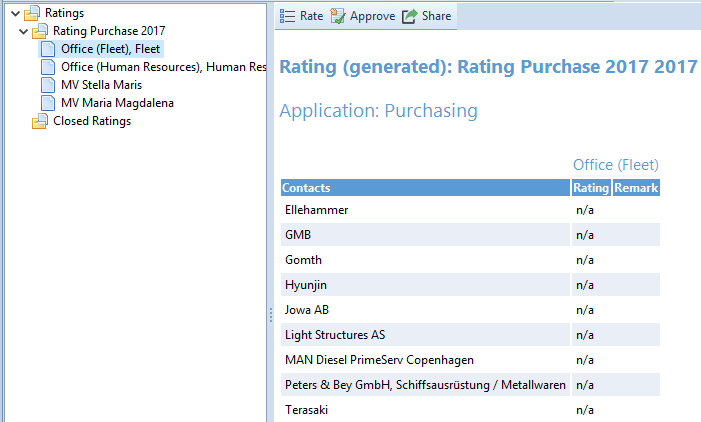
If single PICs for department/site are active these rating processes are also visible.
Rating
Now everybody can rate. For that, all departments respectively sites start the rating tool. All departments/sites see only the requirements of the rating that is allocated to them.
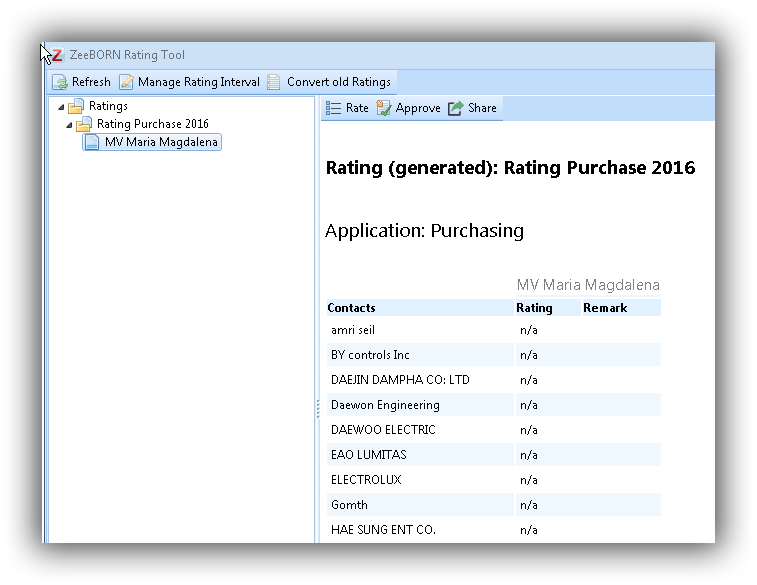
Click on Rate and the following form will be displayed:
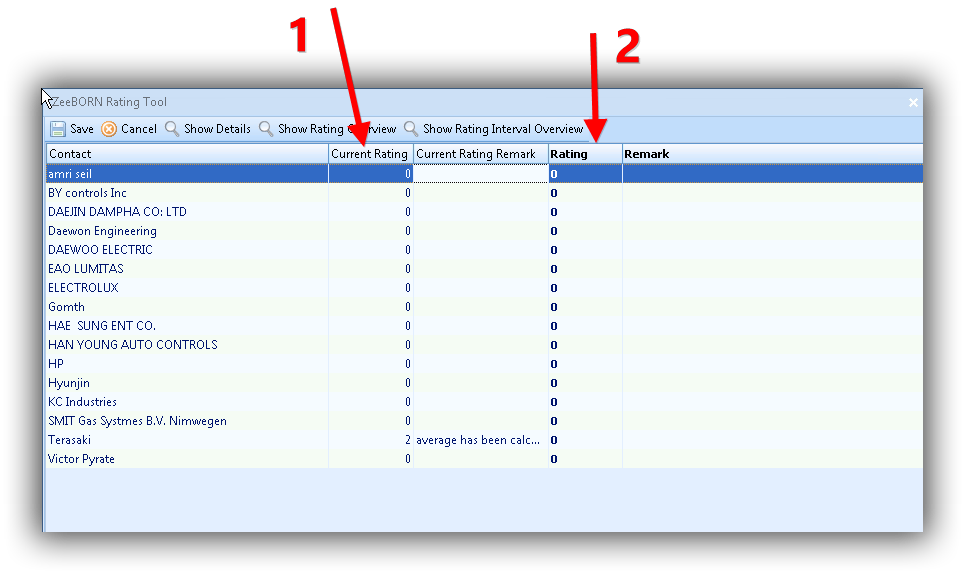
In Current Rating (1) the actual rating include comment will be
displayed and in Rating (2) your rating has to be insert. You can give
a remark but if you rate "Very good" or „Bad" you have to
insert a remark.
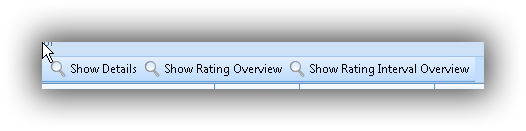
The following details for the selected contact can be shown:
- Contact details
- Rating history
- Rating interval
If a contact could not be rated (because of a contact is not a supplier from this site), the value will be null.
Click the button Save to lock all values . Now they are visible in
overview.
The rating is completely editable as long as the rating will be not approved.
After approving no more changes are possible.
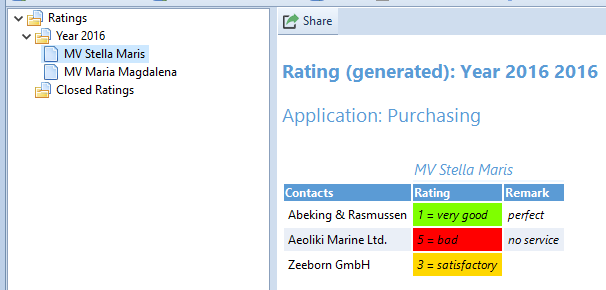
Assign Ratings to Contacts
As all ratings of all departments and sites are reached in the office, the finally rating process can be done.
Start the rating process in office. There you can see all approved (1) or open (2) ratings.
We have to change icons in tree, as at the moment both (approved and
open) have the same icon.
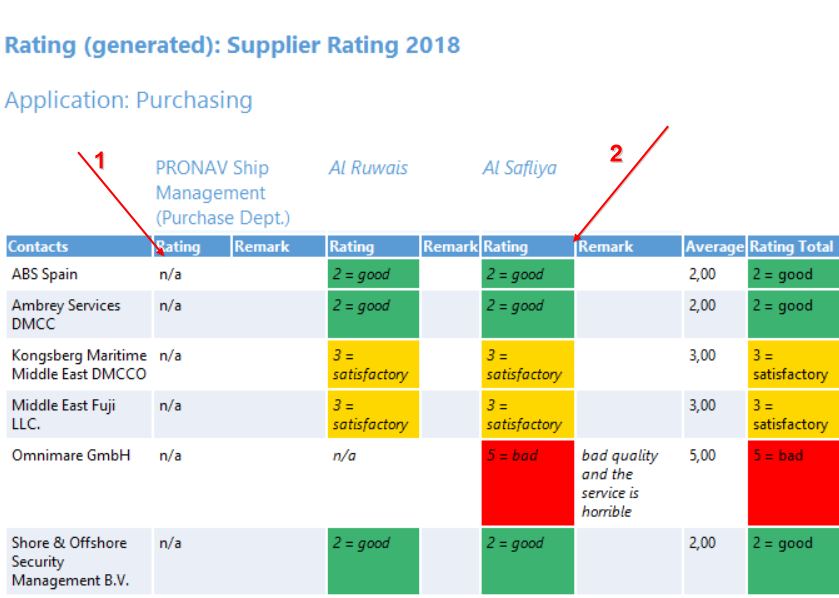
You can start this progress only if all ratings are approved.
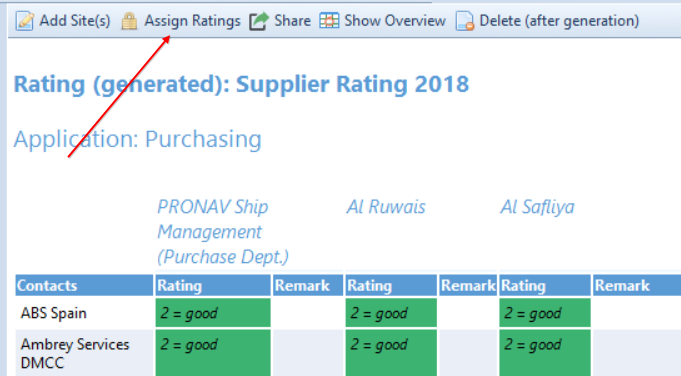
Click Assign Ratings and the following form will be displayed.
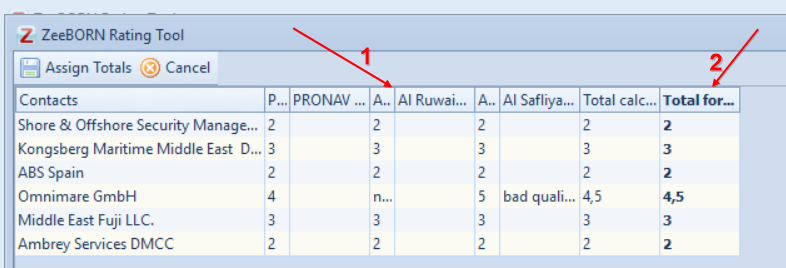
Now all given Ratings (1) are visible and in Total (2) the summary of the ratings will be displayed.
Click Assign Totals and all values will be overtaken to the contacts.
All summaries will be changed in marks (0-10) as defined in
configuration.
Now the rating process is finished and the rating will be moved to
Closed Ratings.
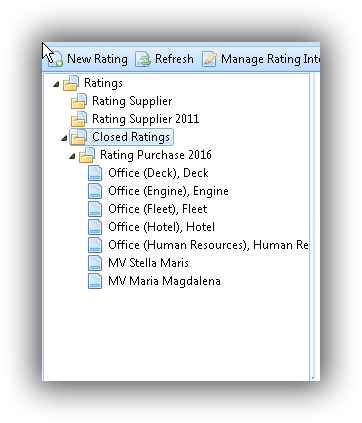
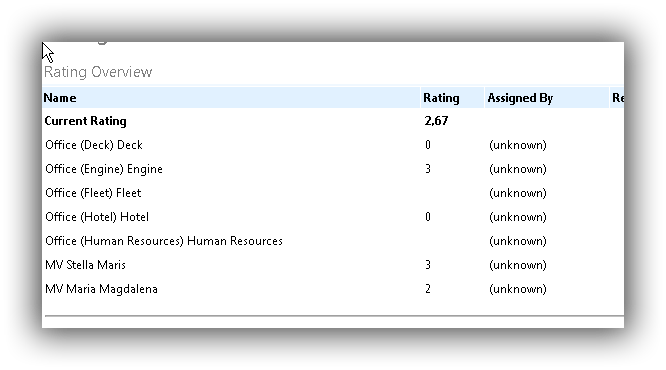
In rating history of contact all data will be displayed, the summary and the single ratings of one rating.
Usage of Ratings
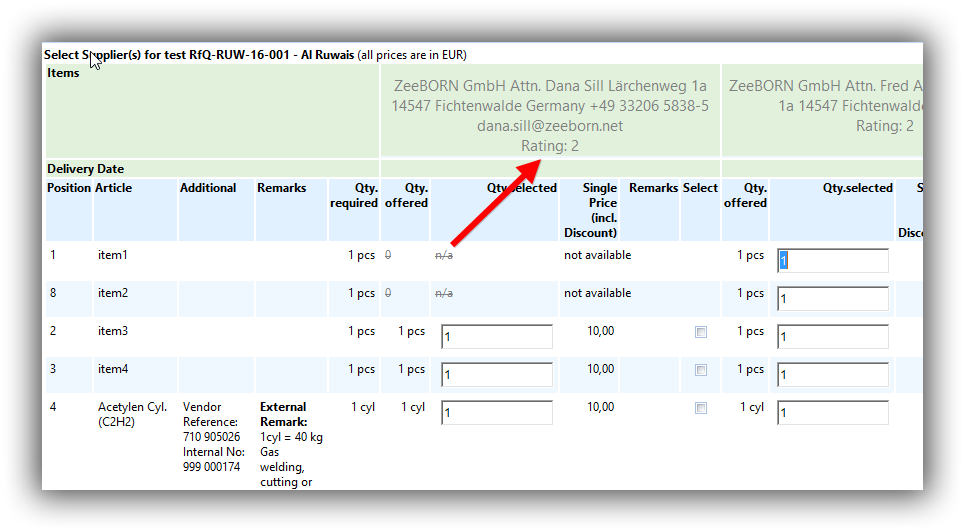
The rating of suppliers will be displayed in RfQ area of the Purchasing module as it can be a fact in decision process.
In the selection area in RQ / PO the rating is also visible.
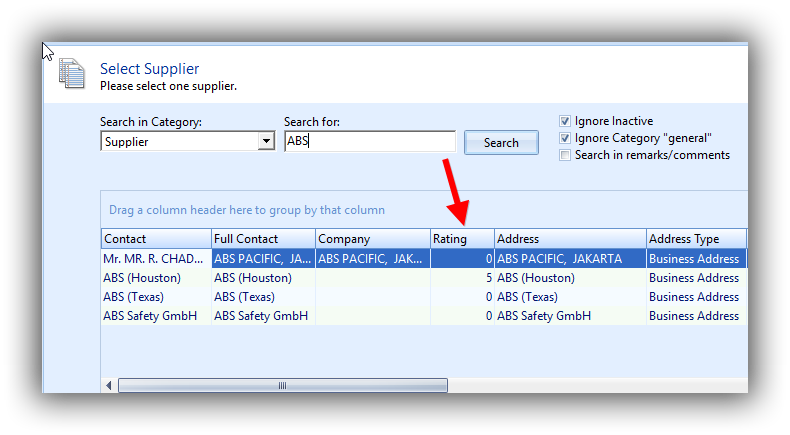
A warning will be displayed if a selected contact has a rating < 3.
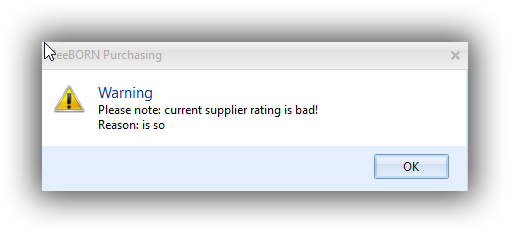
However, the supplier can be selected.