Ship Defect Report
General
The Ship Defects module enables efficient management of vessel and component defects throughout their entire lifecycle. It provides tools for recording, tracking, and resolving reported damages, including the planning and monitoring of related repair activities. The module is integrated with the Purchase system to handle spare parts procurement and repair services provided by third-party companies. It also supports the coordination of onboard repair jobs when required and includes functionality for performing and documenting risk assessments to ensure safety and compliance during defect resolution.
Creating a report
A Ship Defect Report can be started from either of two modules.
From the Maintenance module
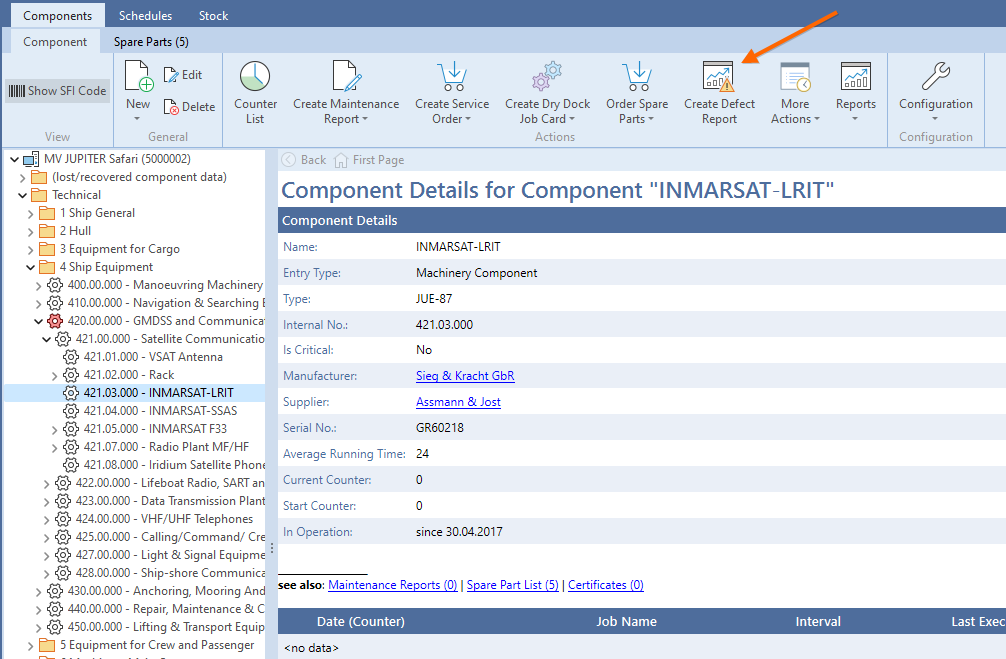
Select the component the SDR is for and click Create Defect Report. The component is then filled in by itself.
From the Ship Defects module
New Defect Report creates the report. Here the component has to be picked with Select from the component tree, or a title entered instead.
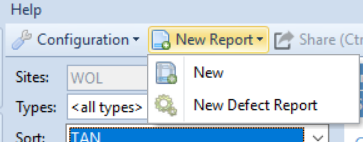
Where a company works with internal and external defect reports, the menu offers New Defect Report (internal) and New Defect Report (external) instead of a single entry.
Whichever way it was started, everything that follows happens in the Ship Defects module.
The form
The sections below walk through the form. For a plain list of every field with a one-line explanation, see Fields of the report form.
Tab "Details"
The SDR has to be linked to a component if the company works with repair jobs.
Warning
Title can be filled in only for SDR without repair job.
Title or component, and the description, are mandatory. Which further fields appear depends on the configuration.
A defect on a component marked as critical is recognised as such: the report is given the highest priority by itself, and its title carries a preceding Critical in the overview.

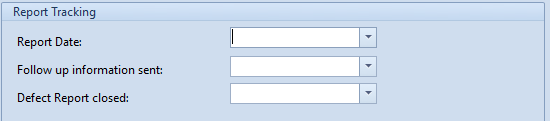
The failure date is preset to today and can be overwritten. Where the report is written later than the failure, the report date records that separately.
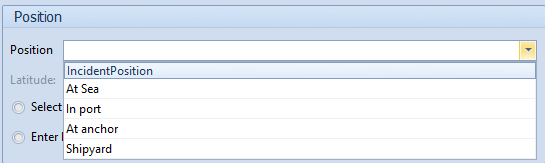
Pick the failure position. Depending on the position chosen, a port or the coordinates have to be added.
Attachments can be added — photographs of the defective component, for instance. (see Attachments)
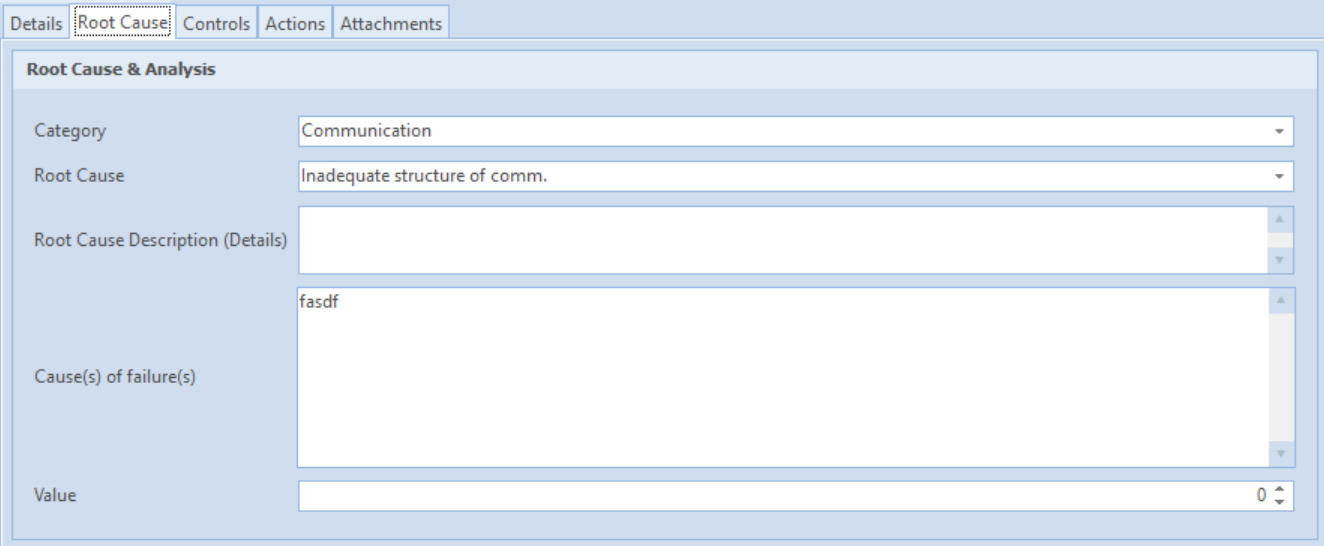
Tab "Root Cause"
Choose the root cause category and, from it, the root cause. Root Cause Description (Details) and Cause(s) of failure(s) are free text.
Tab "Controls"
The Controls tab carries three things: the Risk Assessment, the failed and further controls, and the Management of Change.
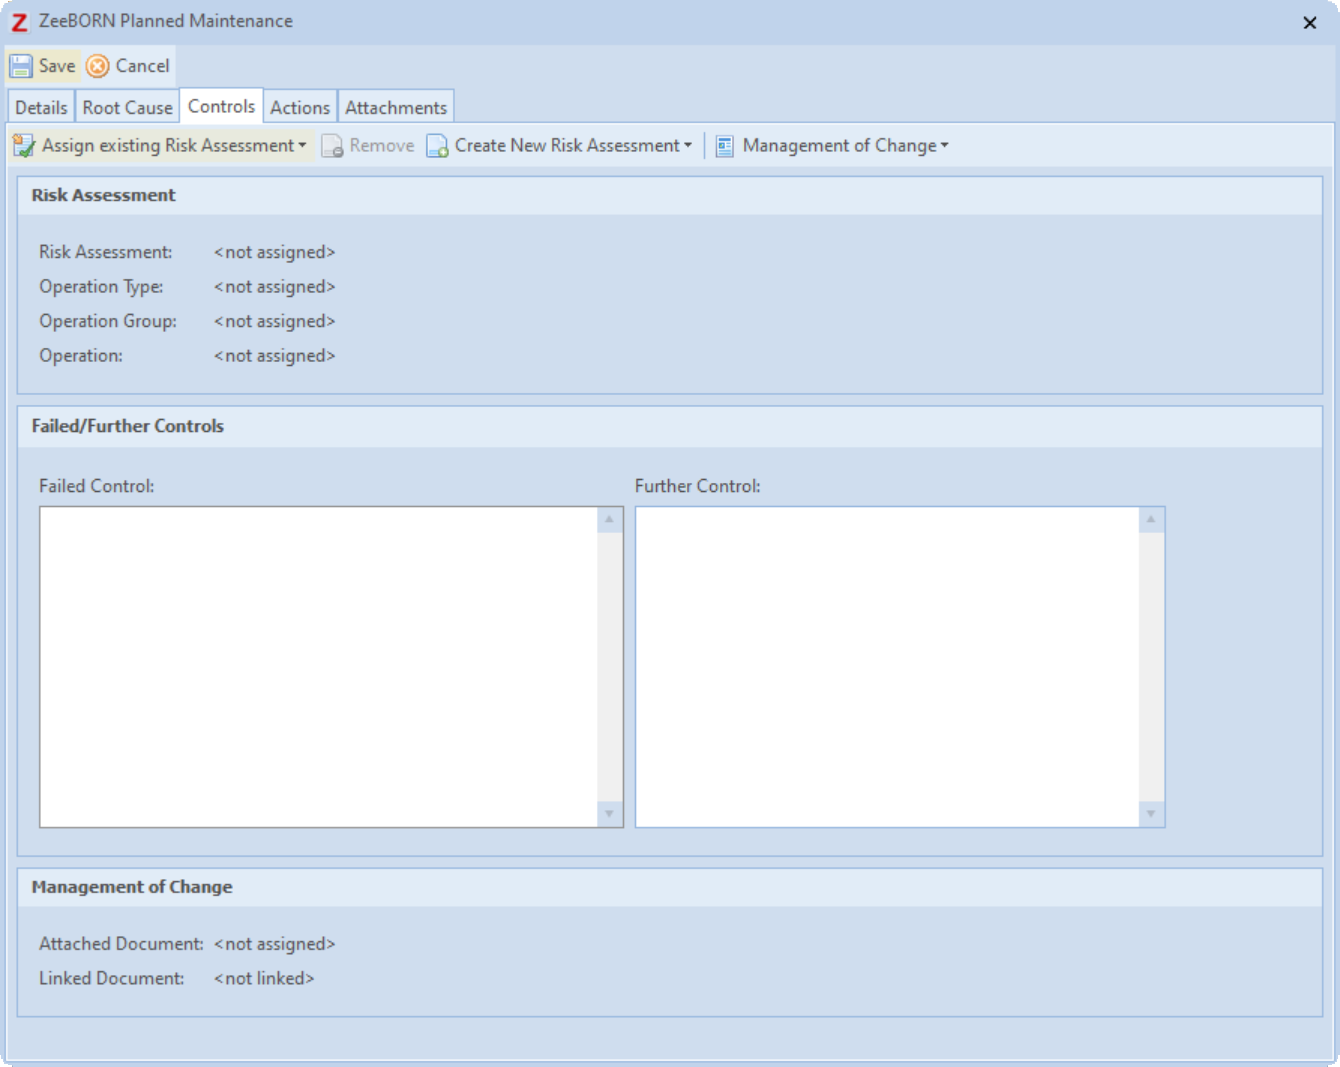
The Risk Assessment
Every ship defect report needs an assigned Risk Assessment — at the latest when the report is to be approved. It can be a new one or an existing, currently valid one, but it has to belong to the component. Whether it does follows from the configuration of the operation:
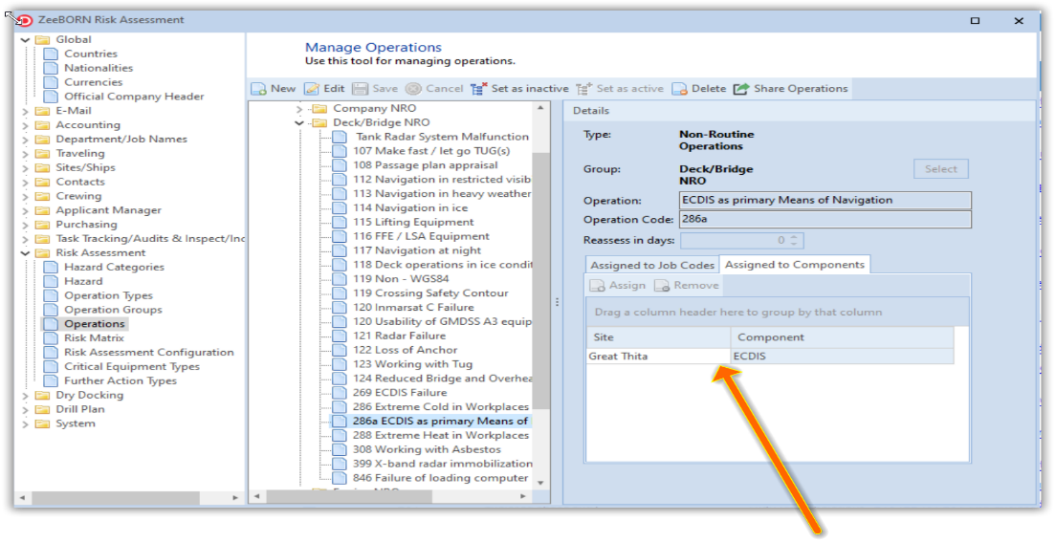
There are three ways to get one:
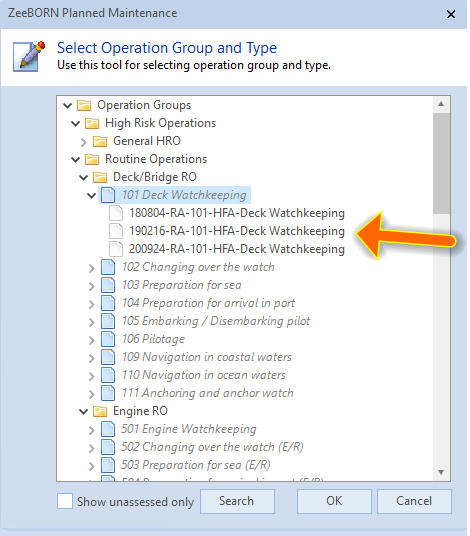
Read the details of the assessment before confirming it with Assign.
Warning
If a new Risk Assessment is created for an SDR and the SDR is then not saved, the assessment has to be deleted by hand — it stays behind even though it was never saved as part of the report.
Failed and further controls
Free text.
Management of Change
A Management of Change from the Incidents module can be attached. The system checks which ones are available and offers them for selection.
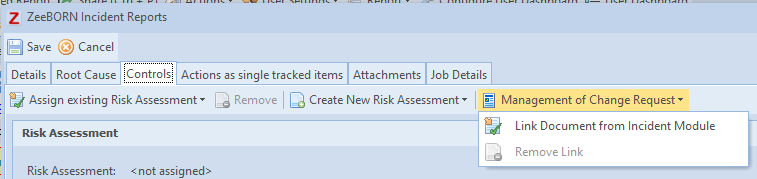
Info
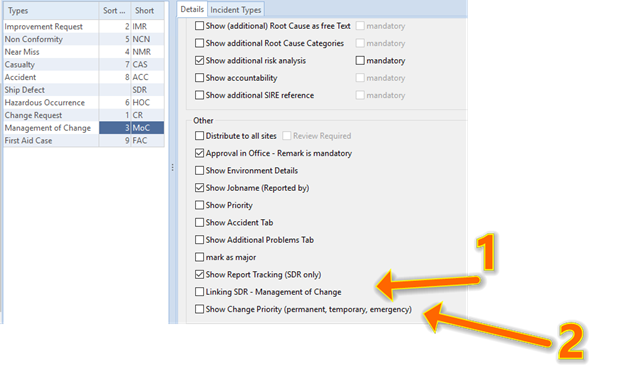
A Management of Change is only offered here if its report type has been configured for it — the corresponding checkbox has to be ticked in the report type configuration. Without it, nothing appears in the list.
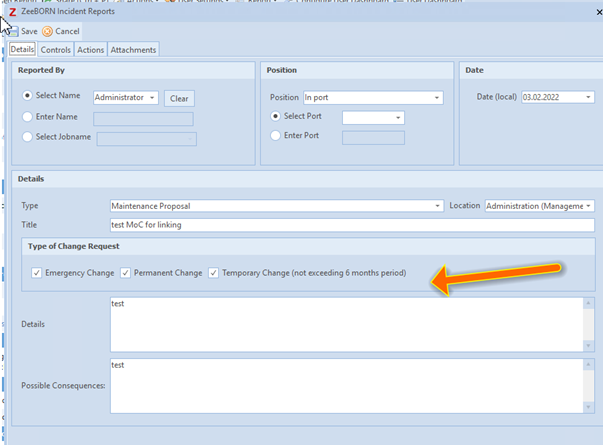
Three types of change request are available, as on the MoC form: Permanent Change, Temporary Change (not exceeding six months) and Emergency Change. At least one has to be chosen — it is checked when saving.
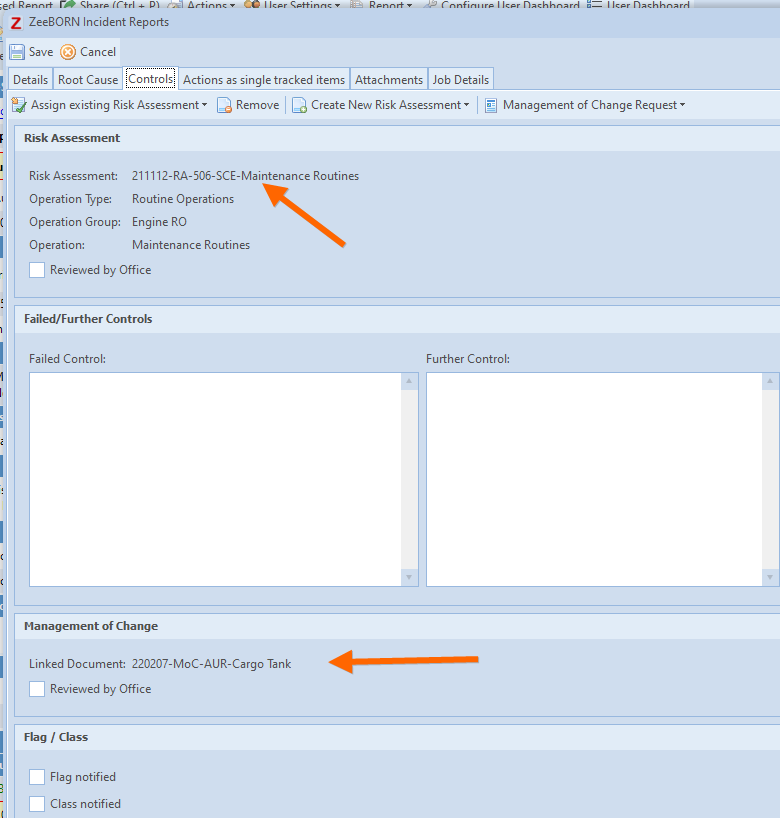
The assigned Risk Assessment and Management of Change are then shown on the form.
See also Attach Risk Assessment and Attach Management of Change.
Tab "Final"
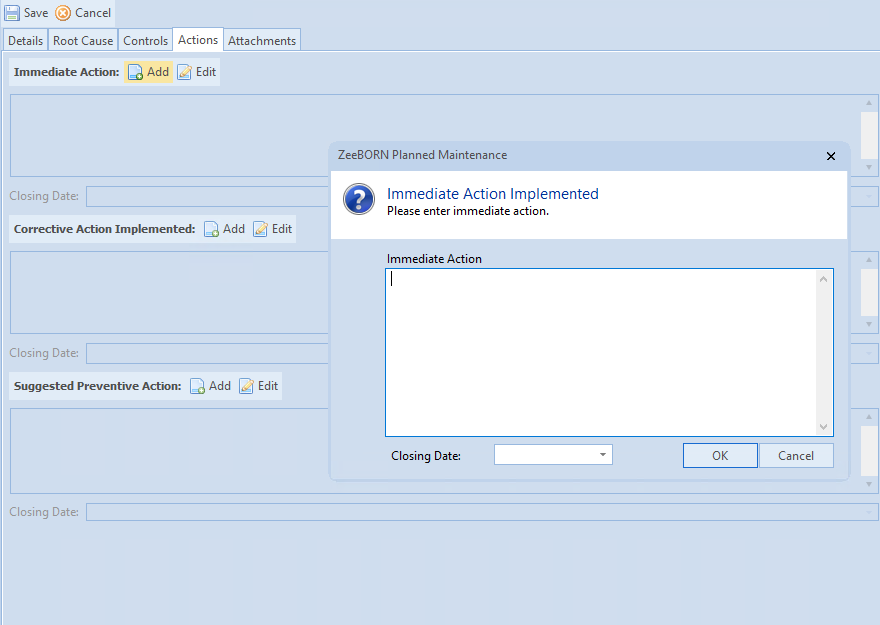
Immediate, Corrective and Suggested Preventive Action can be filled in, together with their closing dates.
Warning
Actions are mandatory.
Tab "Actions"
Corrective and Suggested Preventive Action can be filled in.
Info
Only one Tab "Final" or "Actions" will be shown!
Saving the report
Cancel rejects the report, Save creates it and it becomes visible in the Ship Defects module. Any further processing happens there, not in the form.
Afterwards the report can be changed with Edit if the user has the corresponding right, removed with Delete, and extended with Add Corrective/Preventive Action. If the title or the component has been changed, Update Internal Number corrects the name of the SDR. Create Data Transfer (SDR only) sends a transfer for this one report, without waiting for the regular one.
At the vessel
Once saved, the component details show that an SDR is assigned to it.
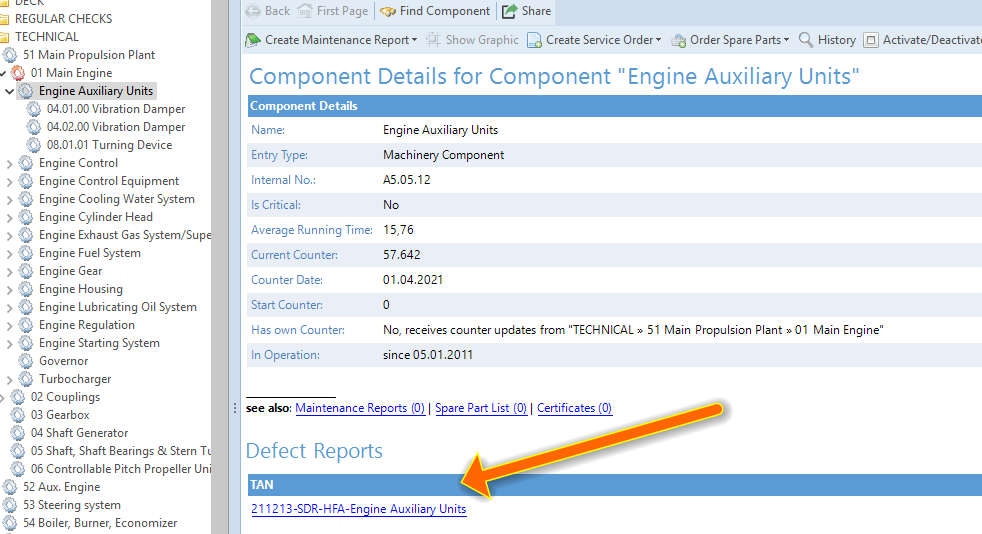
As long as the report is not approved it can still be edited, and depending on the user's rights deleted or approved as well.
Approving on board
Hit button Approve (on board) to confirm, that the SDR is completely recorded and no further processing on board is currently necessary. The SDR will be moved to the folder "Approved reports" and no further changes are possible.
Please note:
Only approved on board SDRs can be further proceeded in the office.
What has to be filled in before it can be approved:
- Root Cause
- Cause(s) of failure
- An assigned Management of Change
- An assigned Risk Assessment
- The immediate, corrective and preventive actions
Closing the SDR on board
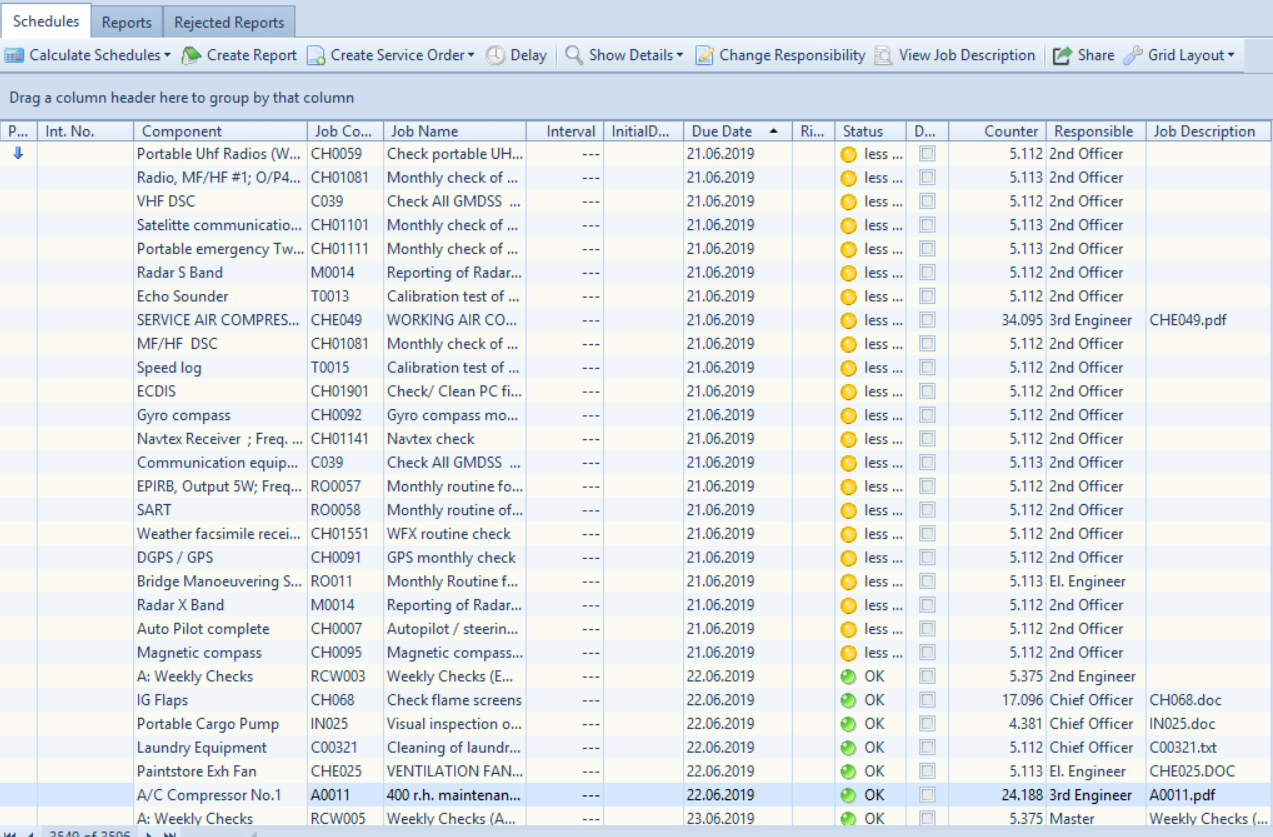
The SDR sits in the folder "SDR – Waiting for closing" on board and can no longer be edited. It is closed by reporting the maintenance job linked to it, and there are two ways to get there.
Through the schedules list — find the job there, report it as usual, then close it.
Info
Company policy may require a Risk Assessment before the repair job may be reported.
Through the component — go to the component in the tree and choose Create Maintenance Report > Regular Maintenance Report. The component overview shows the SDR with its job underneath.
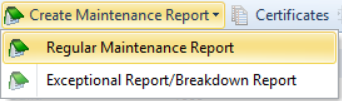
Pick the corresponding job from the list and report it as usual. The job then disappears from the overview, and in the Ship Defects module the SDR moves to "closed" — or to "SDR – For Follow up" if actions are still to be completed in the office.
Info
With the corresponding right, documents can still be attached to an SDR after it has been closed.
In the office
Handling in Office
If the SDR is approved on board it can be edited in the office. (Before it was already visible but marked as OoB – open on board - and could not be edited).
In the office you can now Edit the SDR and if you have the corresponding user rights, the SDR can be rejected or deleted.
Please note:
If you delete the SDR, it will be completely removed from database – so no further investigations can be done. In the most cases it will be better to reject the SDR, the SDR will remain in this case in the database.
Editing the SDR in the office
The SDR can still be edited with Edit if the user has the corresponding right; with Delete the report can be deleted, with Reject the report can be rejected and with Add Corrective/Preventive Action the appropriate actions can be added.
If the title or component has been changed, the name of the SDR will be corrected with Update Internal Number.
The risk assessment and the Management of Change can or have to be reviewed (depend on Configuration).
If the SDR have to be edited by the ship again, it can be sent back to the ship with Resend to Ship.
There are two ways of editing, and the difference matters: Edit records every change in the history, which is normally what you want. Edit (Administrative Tasks) does not — use it for corrections that carry no meaning, a misspelt word for instance, where a history entry would only be noise.
Reviewing Risk Assessment, Management of Change, Flag and Class
The assigned risk assessment and Management of Change have to be reviewed in the office. Switch to the tab Controls and tick the corresponding checkboxes. The same tab holds Flag notified and Class notified. All four show up in the HTML overview of the SDR.
Please note: Checkboxes for review (Risk Assessment, Management of Change) and notified (Class, Flag) are visible in office version only.
Distributing the report to other vessels
If the SDR matters for other ships as well, it can be sent to selected vessels for information. With Request Review the receiving ship has to confirm that the SDR has been read.
Sending the report to the charterer
Where the vessel is chartered, the charterer is assigned under Charterer > Assign Charterer and can be removed again with Clear Charterer. The report itself goes out under Send Official, either as Official Report to Charterer - Send with Attachments or without them.
Reports forwarded to the charterer are shown in green italics in the tree. Once the charterer has replied, the report can go back to the vessel for tracking with Resend to Ship; it then reopens on board in the folder "SDR – For Follow Up".
Adding entries for this or other vessels
Entries can be added to the SDR, for the vessel itself or for others. Select the ships the entry is to be created for, choose the category, and enter the data. Save adds it — one entry is generated per ship.
The follow-up process
If something has to be clarified with the vessel, a follow-up process is started with Follow Up. In the form that opens, enter the responsible and the due date and pick a status:
Attachments can be assigned to each follow-up step and are then shown with that step in the overview; clicking the icon opens them. The attachments of the report as a whole — both those of the SDR itself and those of the individual follow-up steps — are reached together in one place.
There is no limit to the number of follow-up steps.
Warning
If the due date of a follow-up entry has passed, the SDR is shown in red.
Action required – Ship
"Action required – Ship" means, that the crew on board needs to perform an action. The SDR will be stored on board under the folder "SDR-For Follow Up". The crew on board can make the necessary adjustments. After that a new status can be assigned with Follow Up. Assign in the upcoming form the status "Action required – Office" and if you have the corresponding user rights assign the responsible role or user also.
On Board: The SDR will be moved from folder "SDR – For Follow Up" to the folder "Approved reports"
In the Office: SDR is still available in folder "SDR – For Follow Up".
Action required – Office
"Action required – Office" means, that the crew in the office needs to perform an action. On board the SDR will be shown under folder "Approved reports", in the office it is available under "SDR – For Follow Up". Only the crew in the office can adjust.
Once the follow-up is finished, the office either assigns the status "Close out by Repair Job" or goes straight to Approve & Resend to Ship for closing.
Warning
Assigning the status "Close out by Repair Job" requires a remark.
Close out by Repair Job
If the status "Close out by Repair Job" is assigned, the Follow up process is finished. The SDR can be prepared for closing. On board the SDR will be shown under folder "Approved reports", in the office it is available under "SDR – For Follow Up". Only the crew in the office can adjust.
Preparing the SDR for closing
For each SDR on a component, a job has to be carried out by the vessel. It is recorded in the editing area under the tab "Job Details".
Assigning job details
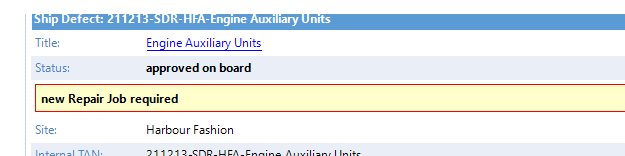
Job details have to be assigned before the SDR can be closed on board. Without them, no job details appear in the SDR overview. Either a new job is created or an existing one is selected for the component.
Creating a new job
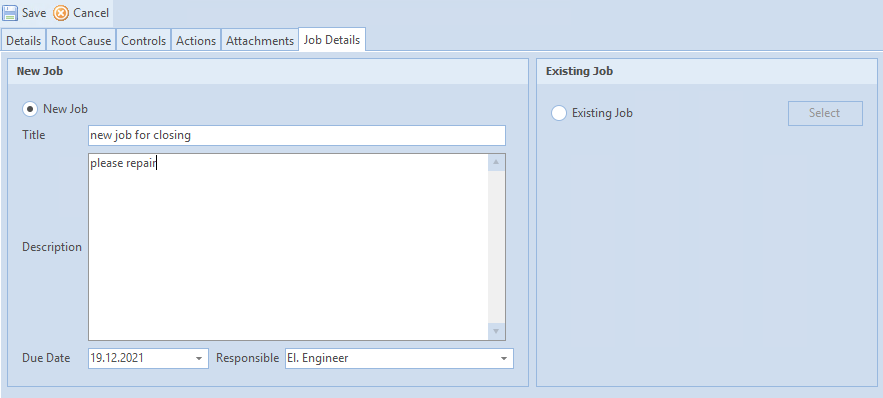
New Job creates one; fill in the details. The job details then appear in the SDR overview.
Warning
At this point the job does not exist yet and is not linked to a maintenance job. It is created when Approve & Resend to Ship for closing is used.
Selecting an existing job
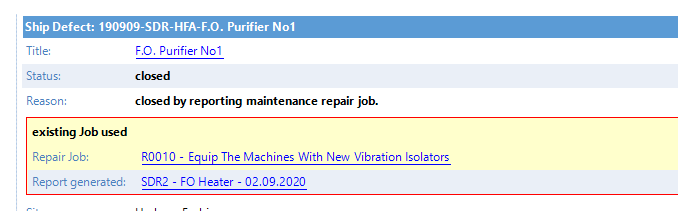
Existing Job enables the Select button; use it to pick the job. Only jobs assigned to the defective component are offered. Because such a job already exists, it is shown as a link.
Approve & Resend to Ship for closing
Once the preparation is done, Approve & Resend to Ship for closing hands the report back to the vessel. The system checks that the mandatory entries are complete.
Beyond the fields already required when the report was created, these are now mandatory as well:
- Job details — for a new job: title, description, due date and responsible
- Review Risk Assessment
- Review Management of Change
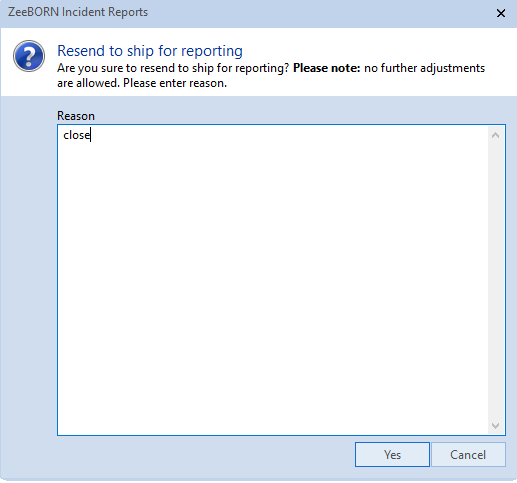
A closing remark is required, and a reason has to be given.
Info
If the follow-up currently stands at "Action required – Office", the system creates a follow-up entry with the status "Close out by Repair Job" by itself, using the closing remark as its description.
The SDR then moves to the folder "SDR – Resend to ship and waiting for closing" in the office and "SDR – Waiting for closing" on board, and stays there until the vessel has reported the maintenance job — at which point it closes.
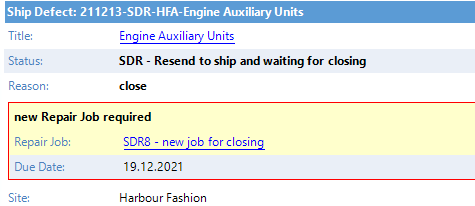
Where a new job was used, its display changes: the job has now been created and reaches the vessel with the next data transfer. Its name carries SDR and a running number at the start of the title, and it is created as a one-time job, available only for closing this SDR.
More Actions
Refresh
(see Refresh)
Search
(see Search)
Show History
(see Show History)
Comments
Comments > Add adds a remark to the report; Comments > Show/Delete shows the existing ones and removes them again.
Attachments
Documents are attached, viewed and deleted under Attachments. Save (with Attachments) writes the official report together with them.
Assign Responsible
A user of the ZeeBORN Software can be assigned to the SDR.
Assign further handling
An insurance case can be added, if the case is depending on the SDR.
Charterer
Depend on Configuration a Charterer can be added to SDR.
Create Data Transfer (SDR only)
A data transfer for the selected SDR can be sent, without waiting for the regular one.

Send Official
Official Report to Charterer
The SDR can be sent to Charterer with Attachments or without Attachments.
Official Report
The SDR can be print out with Logo and Header via Official Report - per Printer/Share or Official Report -print, or can be saved with Save (with Attachments).
See also
Report
Overview per Interval
All SDR of the selected time frame will be shown.